Showing posts with label SuperFoods. Show all posts

Sunday, September 20, 2009

My favorite salad ever: Austrian Lentil Salad

I first tasted a version of this salad in 1990, when my boss's wife, who is from Vienna, Austria, brought a large container of her version to my wedding reception, because she said it's a traditional salad to serve at weddings and promises fertility.

She was pouting when no one ate the salad. I thought "What did she expect, she brought Lentils to my wedding reception!"
Fast forward nearly 20 years, and I had a chance to eat her salad again, and my tastes have matured to the point where I thought it was incredibly tasty. I became an instant convert. I updated and significantly improved upon her recipe (she only used 4 ingredients -- lentils boiled with bay leaf, a simple herbal mustard vinaigrette, and minced onion), and now, I am never without a container of this salad in my fridge. I make it every Sunday, and it lasts all week, holds up extremely well in lunches, and fortunately, did not make me fertile, which is a very good thing, because her recipe lasted longer than the marriage.


I don't know what makes a lentil dish "Austrian" but she claims it was a childhood dish she had many times in Vienna. My version is not likely Austrian, but is certainly inspired by hers.  I use Trader Joe's ingredients primarily, which included steamed and cooked lentils, but you can easily cook your own lentils and proceed with those after you've done so.


AUSTRIAN LENTIL SALAD

Base Salad

1 package of Trader Joe's Steamed Lentils (from the refrigerated section)
1 package of Trader Joe's Beluga Lentils (from the pasta section)
1/2 very finely diced red or white onion -or- 1 shaved shallot (shown in this version)
1-2 very finely chopped carrots
Snipped Italian Parsley
The zest of one lemon (use all the juice, below)
Zest an entire lemon into a large bowl. Add both packages of lentils, the diced carrots and onions, and the parsley. Toss all ingredients thoroughly and set aside.


Dressing

The basic dressing is a lemon vinaigrette, but you should feel free to use your favorite oil & vinegar dressing, being certain to add the mucho lemon zest and lemon juice to it, to create the unique flavor. Here is my tried and true method:

1/2 cup of Trader Joe's Olive Oil
1/4 cup of Trader Joe's Seasoned Rice Vinegar (sometimes I use a bit of rice vinegar, and a bit of cider vinegar, when I want it tarter)
1 dollop of TJ's Dijon Mustard
The juice of 1 whole lemon
Salt and Pepper to taste

Combine all in a blender cup to emulsify, and pour over the lentil salad. Toss thoroughly, adjust seasonings to taste, and serve chilled. This salad requires no cooking (unless you've cooked your own lentils) keeps in the fridge all week, and makes a wonderful, healthy, high protein, high fiber very satisfying lunch.

In fact, I'd never once thought I'd say this about a salad, especially one with lentils, but I'll stand in front of my open fridge door at night and eat this salad right from the container, with a spoon. If I worked at a TJ's, I would make this easy dish and demonstrate it, to convert people to the wonder of lemony lentils as a salad.


Personal note to my sister, Weezie: Aren't you proud of me?! I finally figured out a use for my obsessive acquisition of vinegar and oil even though I've always hated oil & vinegar dressing!

Monday, June 15, 2009

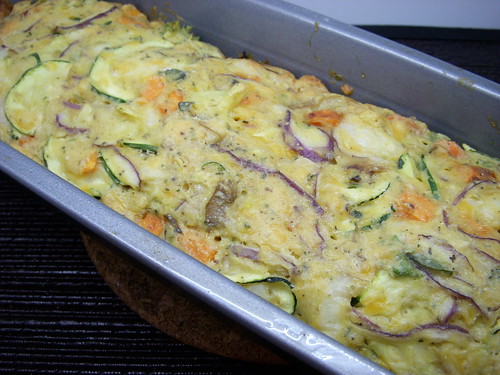
Hippie Quiche: Zucchini Cheese Pie Bake

Zuke Pie Whole

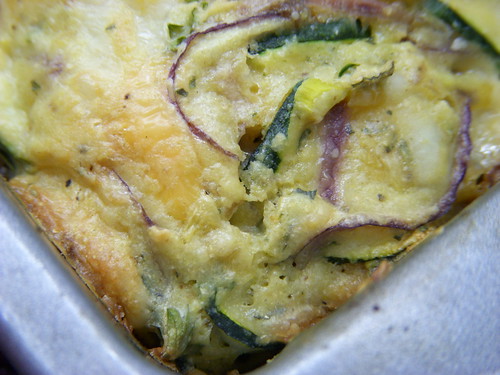
Zuke Pie Macro

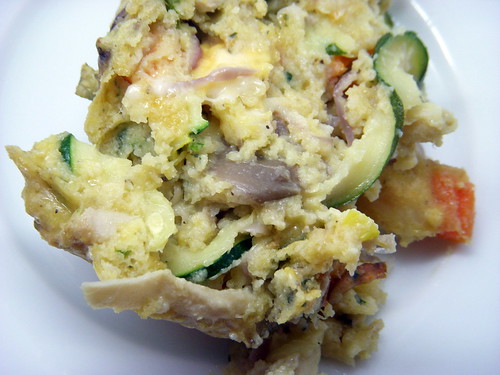
Zuke Pie Steaming and Ready to Taste

This is a recipe for Zucchini Pie by my pal Liz in New York, who bakes it and serves it in her bento box lunches quite frequently. It's a cross between a veggie loaf and a healthy quiche. Since I made chick pea flour zucchini bread earlier in the week, I had another zucchini waiting to be used, more chick pea flour of course, and her recipe in mind. I'm finding the chick pea flour really tasty, and the high protein and fibre is an added bonus.

This would be both a good vegetarian main dish and a good side dish as well, actually. I served it with a piece of grilled rainbow trout, so this acted as my "vegetable stuffing on the side." If you're planning to grow zukes in your garden this year, take note. This will help use up your bounty.

This is a hard to fail recipe. She uses more or less cheese depending on what she has, more or less veggies, depending on what she has, and less oil. You really just need enough liquid to bind the batter together. When it looks gloppy and moist and the veggies are coated, it's ready to go into the oven. This is what I put into mine:

CAN'T SCREW IT UP ZUCCHINI PIE

1 large thinly sliced zucchini
1 grated carrot
1 small onion chopped
1 small diced yam
1 handful of torn oyster mushrooms
1/3 cup whole wheat pastry flour
1/3 cup fine ground corn flour
1/3 cup chick pea flour
1 cup grated mild cheddar cheese
1 rogue slice of Lite Jarlsberg cheese from the deli drawer
1/4 cup canola oil
2 egg whites and 1 whole egg, beaten
1 handful of grated parmesan
1 handful of chopped fresh herbs (I used basil, parsley, thyme, oregano and chives)
1 teaspoon baking powder
A few liberal shakes of Penzey's Sandwich Sprinkle and Mural of Flavor seasoning (basically more herbs and garlic salt)

Preheat oven to 350 degrees. Combine all ingredients in a large bowl and mix well. Spoon zucchini mixture into a 10 inch glass pie or quiche plate that has been coated with vegetable cooking spray. I used an IKEA loaf pan -- they are quite longer than your average loaf pan by a wide margin so it spread out as shallow as a pie pan and worked fine. Bake for 45-50 minutes or until golden brown. Cool for 15 minutes before slicing.

Wednesday, May 13, 2009

Barefoot Bloggers: Tuna Salad

This month's first selection for Barefoot Bloggers is mine and I chose Ina Garten's Tuna Salad. This was a tough choice -- I moved up the list so quickly, I had to make new choices repeatedly as the time of year changed, and at the last minute, I just chose something I thought was fresh and simple and relatively healthy.

I also chose this recipe because the best "salad" I ever had was a grilled tuna salad dish at a Todd English restaurant -- Olives, in Las Vegas. It was so memorable I still think about it. Ina's recipe was similar in most respects, so I thought it would be a good stand-in.

Regrettably, I've learned that what I can get very easily -- tuna steaks for $5.69 a pound -- others cannot, so for those who gave this recipe a try, thank you, and for those who couldn't, I'm sorry about that. I trust you used the Barefoot Backtrack feature to choose something more to your liking.

I stared with Albacore tuna steaks -- $4.10 for the package. The steak is brushed with olive oil and grilled in a very hot pan. Ina instructs for just a minute or two on each side. This is essentially the same as the grilled tuna you'd find in restaurants, blackened on the outside and raw on the inside. While I do like this, I prefer my raw fish to be served to me in restaurants, and not handled in my own home, so for my version, I grilled it all the way through (and this is the way it was served in the Vegas restaurant, where I enjoyed it so much).

In the meantime, I'd mixed the dressing and tossed it with a chopped avocado, fresh from the Farmer's Market today. The dressing is very basic -- lime juice, olive oil, soy sauce, wasabi, salt and pepper. I ended up just whirling the ingredients together in quantities that tasted good to me. I didn't add nearly the salt she called for -- soy sauce takes care of that, and I added sesame chili oil in addition to the drops of hot sauce. I'm a hot sauce weenie, I don't like it all, but I know it serves an important purpose in certain dishes, like Asian dressings. I also added a lot more wasabi than called for. Love that stuff.

After the tuna chunks were grilled, I added them to the dressed avocados.
Now, bear something in mind. Ceviche, a traditional spanish dish of cold fish in a citrusy lime dressing, is "cooked" by adding lime juice to fish. The acid cooks the fish, so this tuna salad, which contains a lot of lime juice, cannot be made in advance and stored without the lime juice cooking the fish. If you're making it with a raw interior, don't dress the cooked tuna until you are ready to serve it, and reserve any leftover dressing. Store the tuna undressed, if you want leftovers. For mine, which was cooked all the way through, it was less of an issue, but head's up!

I added chopped scallions, more sliced avocado, and sprinkled with additional chili oil. I didn't bother with the red onions. I thought that a big handful of scallions was adequate for the onion flavor.

And here it is, my tower of Tuna Salad, ready to chill (it's great warm, but I preferred it chilled).


I really liked this. The dressing would be great with chicken, salmon, beef, tofu -- you name it. For those who gave it a try, thank you. Tuna isn't hard to make and it's easy to customize. In fact, I'd encourage you to cook a tuna steak and dress it as you would a traditional tuna salad. There is no comparison to the canned stuff.

About this challenge: The Barefoot Bloggers join forces and cook or bake recipes by Barefoot Contessa Ina Garten each month, chosen in order by members, and present them for discussion on two Thursdays each month. Hungry? Please join us at the table!

Monday, March 2, 2009

Big Red Kitchen's Two Ingredient Pumpkin Cake and Three Ingredient Glaze

... except I used three ingredients in the cake, and a few extra ingredients in the glaze. Oh, and no pumpkin. I couldn't help myself.

I've long admired the concept of "Cooking the Books: A Cook Through Blog Roll" which seeks those committed enough to cook their way through an entire cookbook. I've long wanted to do this, and I even challenged myself with a vintage cookbook by Margaret Rudkin, and yet here I am, reading other blogs, and cooking from those blogs or from Tastespotting and from random Google searches.

Robin Sue of Big Red Kitchen has taken that Cooking the Books concept and is "Cooking the Blogs" -- an equally good idea, and a plan I recognized I was more likely to adopt. So, it seemed fitting I start with a recipe from Robin Sue's blog, and since one of her most popular recipes (see her sidebar) happens to fit in with my current plan of cleaning out my pantry and not doing any grocery shopping this month (I allow myself to buy only dairy, veggies, and fruit when I'm in "Use It Up Mode), it suited me perfectly.

In Robin Sue's recipe, she uses one cake mix and one can of pumpkin, mixed and baked, and nothing more, for the cake, and then a simple 3 ingredient apple cider glaze. I adapted it only slightly, and had amazing results. Not because of my adaptations I assure you -- the recipe is fine in its original form. I just was very skeptical I'd like the end product.
You see, I've had the "Diet Soda Cake" where you are guaranteed a lower fat, lower sugar cake if you just combine one can of diet soda pop and one cake mix. It was, in a word, ATROCIOUS. Heavy, wet, gummy, metallic. I still shudder.
Here I was, though, with a cake mix and a box of frozen butternut squash puree, and a raining-so-hard-it's hailing-Sunday afternoon.

I decided I was going to make a cake and watch DVR reruns of The Office. I did exactly that.

Butternut squash is often interchangeable with pumpkin puree (indeed, many commercial pumpkin pies are actually butternut squash, I'm told), so I defrosted a brick of it, and added it to a Duncan Hines French Vanilla Cake Mix, and combined thoroughly. I noted others remarked on the batter being the consistency of brownie batter, and I was not trusting enough to leave it alone. I don't like heavy, gummy cake, and since I had out the jar of apple juice (for the glaze) anywayyyyyyyyyyyy, why not? I added 1/4 cup of apple juice to the pumpkin-cake mix, and beat it until it was smooth. I poured it into a greased and floured rectangular cake pan and baked it for 30 minutes.

I was still not trusting, as I made the glaze. For the glaze, I combined 1 cup of powdered sugar, 2 tablespoons of apple juice, and a scant few shakes of Pumpkin Pie spice, and beat it thoroughly. To me, most powdered sugar glazes taste like raw powdered sugar and I always strive to avoid that. I didn't care for the sugary taste, but liked the flavor overall, so I tarted it up by adding a splash of lemon juice. That helped considerably, but it was still too powdery-sugary tasting. I added 1/4 teaspoon of corn starch, and quickly brought the glaze to a bubble in a sauce pan, and immediately took it off the stove to cool. That did it. It took away the "raw taste" and turned the glaze into a thick, glossy glaze with the consistency of honey.

The cake was now cool, and I cut into it. It was not gummy or wet, as Robin Sue promised. It was actually so light, so fluffy, it was almost TOO tender. If I could describe it as anything it would be "a cake of soft baby powder and fog." It was powdery soft, and absolutely wonderful. The flavor was like a mild pumpkin pie in cake form, and with a drizzle of the glaze, it was quite tasty. A sure fire easy cake for a pot luck or unexpected guests for breakfast, and, bonus -- it's lower fat than had you made the cake or the pie in the traditional manner, and, the pumpkin and squash are super foods, which officially makes this HEALTH FOOD.

Two thumbs up, Robin Sue!


CAKE

1 cake mix of your choice
1 regular can of pureed pumpkin or butternut squash

Mix thoroughly. Add apple juice to thin, if desired. Pour into buttered, floured, rectangle cake pan and bake at 350 for 30 minutes, or until a cake tester comes out clean.

GLAZE

1 cup of powdered sugar
2 T of apple juice
1 shake of pumpkin pie spice
1 splash of lemon juice
1/4 teaspoon corn starch

Mix thoroughly, heat to a bubble, remove from heat, stir, and let cool. Drizzle on your cake. 

Wednesday, January 28, 2009

Best Breakfast Burritos EVER

I love this breakfast burrito so much, I've had it for dinner three times in the past week. It's so delicious, so simple, and so fast, it's my current love. I was inspired by the version made by Muneeba at An Edible Symphony, because as soon as I saw it, I knew it was the answer to what I disliked most about most breakfast burritos: The over-cooked scrambled egg and often greasy breakfast meats. I love the concept of a breakfast burrito, but I often dislike the end result for those two reasons.

As soon as I saw Muneeba's version, I smacked myself in the head and said "Of Course, use a softly fried egg, don't use a scrambled egg, silly, and that problem is solved! Who told you they have to include scrambled eggs?"

I had all the ingredients I needed on hand, and set to work.

Above: For my version, I started with a fresh tortilla, from dough. My local Costco sells the uncooked tortilla in paper thin sheets. The only require a quick heating (perhaps 1 minute or less per side) in a dry skillet to cook. Naturally, you can use a plain, cooked tortilla, but do heat it first, in a dry skillet, so that it warms the ingredients as you build. Here, I just place the uncooked tortilla in a pan, no butter or fats required, and turn it on high. Note it is slightly translucent.


Above: In about 30 seconds, the tortilla begins to puff, and turn white as the dough cooks.


Above: When the first side is browned and bubbly, turn it over with tongs and cook the other side very briefly, perhaps 15-20 seconds. The second side should be less brown -- we're going to be working on that side again in a little bit, below. Keep your pan warm, but not hot -- you'll need it again in a minute.

Above: Lay the tortilla on a paper plate or towel, and on the darker, more grilled side of the tortilla, quickly spread a thin layer of cilantro dip and sprinkle with shredded cheeses. Mine is my favorite -- Trader Joe's Roasted Pecan Cilantro Dip (basically a cream cheese and cilantro spread). Muneeba's version used Cilantro Chutney. I have that as well, but this dip is my preferred taste -- it's milder.

Above: Add another layer of your preferred toppings. Here, I used just a scattering of black beans, and a scattering of diced green onion. You could certainly add Spanish rice here, or avocado slices, or even shredded pork or carnitas. Here, I'm just keeping it simple to show you my base burrito. Set this stage of your burrito aside, and return to your warm pan.

Above: Lightly butter the skillet and softly fry an egg. You want the whites cooked gently, and still a somewhat loose yolk (but no runny whites, yuck).

Above: Just before it's ready to come out of the pan, I quickly break the yolk with just a swirl or two. I don't want it hard or cooked through -- I just want the yolk to be more evenly distributed with the egg white. Keep the pan warm, but not hot. Do not wipe it out.

Above: Quickly slide the egg from the pan onto your waiting tortilla. All photos from this point forward will be blurry because I dropped it right in my egg yolk! I tried to get the yolk off the lens. I think I need a q tip and alcohol.

Above: Fold up the sides and roll up like a burrito.

Above: Place the rolled burrito back in the warm pan, and using the trace amount of fat still left, begin to brown/crisp the outside of the burrito. Remember I told you that I spread the dip and toppings on the browner of the two sides? That's because when it goes into the pan again to warm up, the less brown side will catch up. This also helps melt the cheese a bit inside, and finishes cooking the soft egg.

Above: Slice in half, take a bite, and enjoy the best, most flavorful, unique, and definitely NOT greasy and heavy, Breakfast Burrito.

Friday, November 14, 2008

Roasted Butternut Squash with Crispy Sage and Italian Sausage


I was inspired by Dragon's incredibly easy dish of Roasted Butternut Squash with a Sage and Balsamic Glaze, and had all the ingredients on hand. Always a nice moment when you know you can get up, go to your kitchen, and recreate someone's recipe. I wanted to add a bit of protein and make it a full meal, rather than a side dish, and after oven roasting a piece of Italian Sausage, and dicing it onto the dish, I had it. Delicious! Thank you Dragon.

Thursday, October 9, 2008

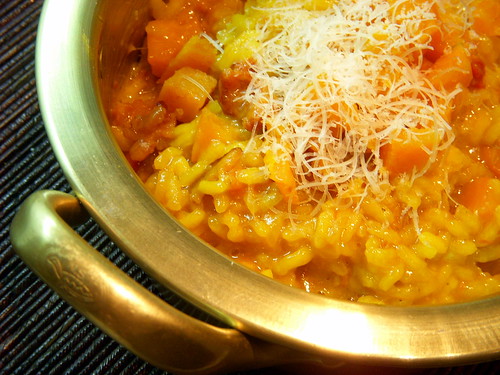
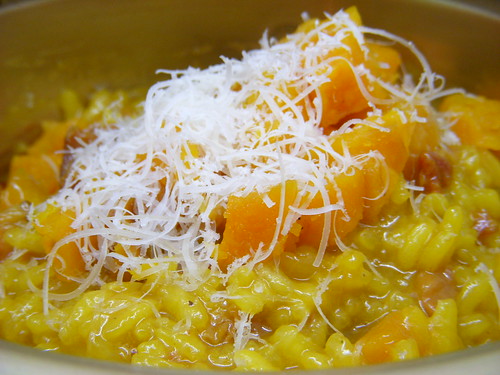
Barefoot Bloggers: Butternut Squash Risotto

Butternut Squash Risotto, Step 11

I had mixed feelings about this month's selections for the Barefoot Bloggers. The first of two selections is Ina Garten's Butternut Squash Risotto as chosen by Rachel of Rachel Likes to Cook, from the Barefoot Contessa Family Style cookbook.

Oh, I was quite certain the risotto would be delicious, and I love, love, love squash. It's hearty fare, perfect for Autumn, but it's still rather warm here in Northern California, I've been working my butt off at the office, I'm cranky and tired, and I admit it ... the few times I've had risotto, I truly never understood what all the fuss was about. A fancier rice pilaf! I knew, however, I wasn't having it served under ideal conditions. The first time I had it, it was from a mix. From Target, no less. The second time I had it, it was from Whole Foods' hot dinner case, and it was hard and dry. The third time I had it, it was "to go" from a nice restaurant. It's not the kind of thing that travels well and it was just thick, heavy rice pudding when we got it home.

Honestly though, the primary reason for my reticence was simply that I've never made risotto from scratch and the thought of it intimidated me. Still, that's what these blogging groups are all about, creating dishes out of our comfort zone, with the ideas from and support of my fellow bloggers.

Having now completed the task, and I made it as close to the recipe as I possibly could, with no shortcuts other than scaling it down by half for me (with guaranteed leftovers), I can say the following:

Yes, it was a bit time consuming.
Yes, it was a bit rich and fattening.
Yes, it was worth it.
Yes, it was easier than I thought.
Yes, I will make it again. For sure.
Yes, it was Fan. Flipping. Tastic.

Rachel, I bow in your general direction, congratulate you on your guts, and blame you for the carb-fat I'm going to be gaining this coming winter.

On with the picture show, my friends.

BUTTERNUT SQUASH RISOTTO, ADAPTED FOR ONE PERSON

Butternut Squash Risotto, Step 1
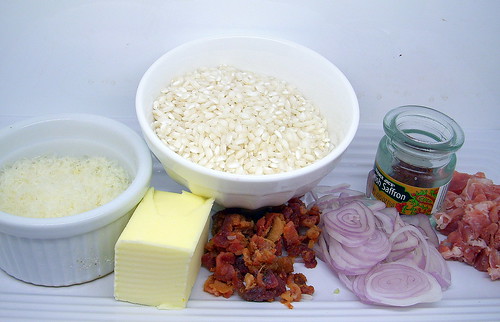
Assembling everything in advance (a rarety for me, but I can't afford to screw this up -- I already got the wrong kind of pancetta, so I added a bit of crumbled bacon I had on hand to make up for it). Left to right, parmesan cheese, butter, bacon, rice, shallots, saffron, and pancetta (it's actually a close cousin, but we're calling it pancetta for simplicity's sake)

Butternut Squash Risotto, Step 2
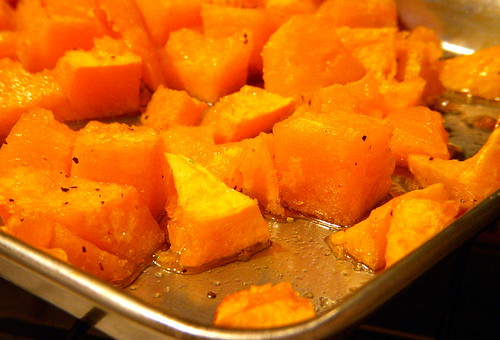
Roast the diced cubes of fresh butternut squash in olive oil, salt, and pepper, until tender.

Note: I wish I had not added the salt and pepper at the various stages called for. Pancetta, butter, bacon, parmesan cheese -- these are all salty items and I should have waited until the recipe was done, and salted to taste. It was a bit heavy on the salt, but still delicious.

Butternut Squash Risotto, Step 3
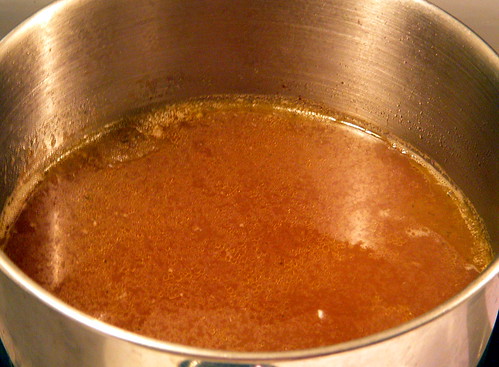
Simmer my homemade chicken stock, which is probably the most profound change in my cooking to occur this year -- I made a pot of fresh stock from a rotisserie chicken, froze it in baggies, and finally understood why all chefs tell you to make your own stock. BECAUSE YOU NEED TO. YOU REALLY, REALLY NEED TO. I can say that barring a crisis requiring canned goods, I'll never go back to store-bought stock.

Butternut Squash Risotto, Step 4
Simmer the pancetta, shallots and bacon in the butter, until soft, but not browned.

Butternut Squash Risotto, Step 5
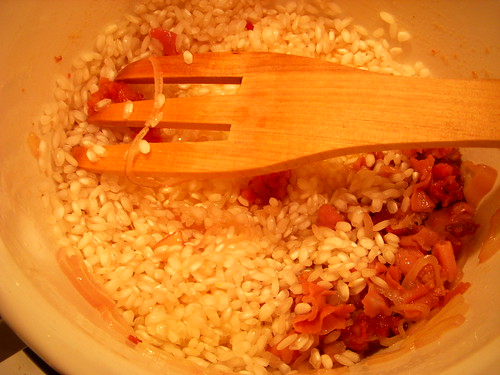
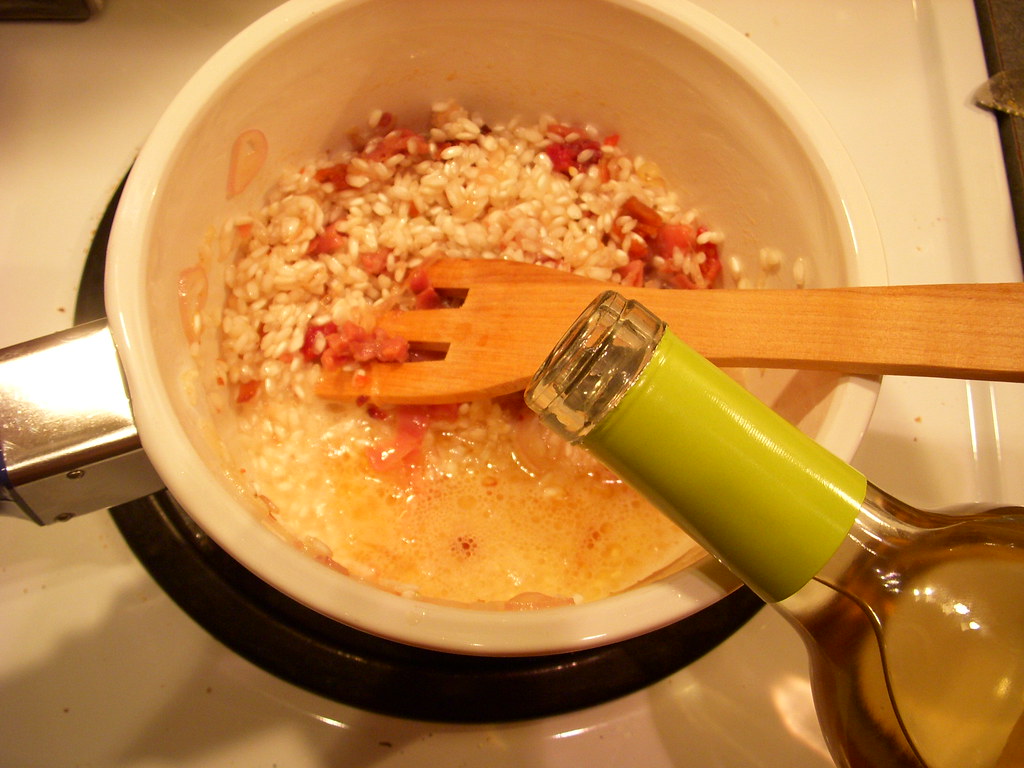
Add the rice and stir to coat the rice in the melted butter.

Butternut Squash Risotto, Step 6
Add a splash of white wine now, and simmer the rice in the buttery wine.

Butternut Squash Risotto, Step 7
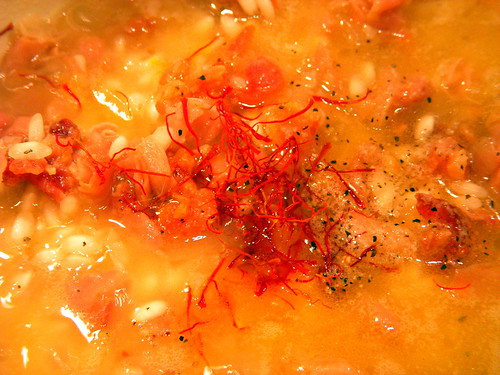
Add the saffron threads and more salt and pepper. See note above -- I wouldn't add the salt and pepper next time. Trader Joe's, I curse you for having such a crappy spice selection, but, for those few spices you DO have, I thank you for making them so affordable.

Butternut Squash Risotto, Step 8
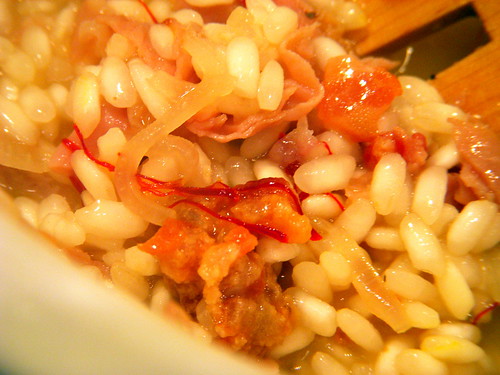
Adding the ladle of chicken broth. Ladle, ladle, ladle. Stir, stir, stir. Look at all those pretty ingredients. Rice, shallots, saffron ... coming together nicely.

Butternut Squash Risotto, Step 9
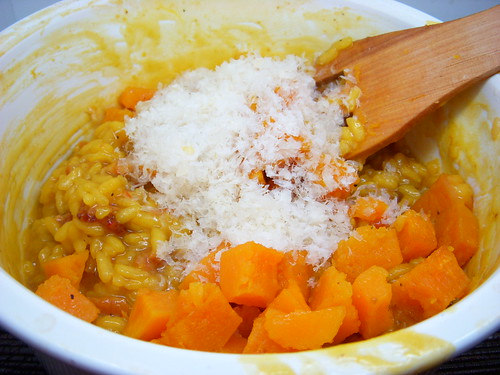
After lading broth and cooking in installments with continual stirring, it thickened up nicely, was velvety, and, ready to take the cubed, cooked squash, parmesan cheese, both added off the heat. Look how messy my pot is. My stove was worse.

Butternut Squash Risotto, Step 10
Hello, you beautiful, fattening, sexy beast. You don't come here often, do you?

Butternut Squash Risotto, Step 12

About this challenge: The Barefoot Bloggers join forces and cook or bake recipes by Barefoot Contessa Ina Garten each month, chosen in order by members, and present them for discussion on two Thursdays each month. Hungry? Please join us at the table!

Monday, August 11, 2008

SpaFlyer Sunday Brunch: Grilled Turkey Cheese Sandwiches


A simple and healthy sandwich of Swiss cheese, homegrown tomato, and smoked turkey, on hearty wheat bread, dipped in egg white and grilled until warm and toasty. Very tasty. Recipe made for SpaFlyer Sunday Brunch -- head on over for healthy spa cuisine.

Thursday, July 24, 2008

Barefoot Bloggers: Seafood Salad, Two Ways

This week's Barefoot Bloggers Challenge is Smoked Salmon Spread, chosen by Ashley of The Spicy Skillet . I love most seafood so I didn't have the "oh oh" feeling many of my fellow bloggers had. Plus, I knew immediately I'd be dividing it up between two seafoods, because I had some crab to use. It was an "ah hah! That's what I'll make with that crab" moment. Like one ever needs help figuring how to eat crab.

This is another recipe which proves many spreads and dips are just as easy to make as they are to buy. I only had to pick up a small package of salmon from Trader Joe’s and I had everything else, and it came together very quickly.

That said, I thought it was under-seasoned as written, and I felt it needed more of all the basic flavor — salt, pepper, lemon, horseradish and dill. I added a little bit more of each of those things. In retrospect, I should have made it as is, and then seasoned it again later, before serving, giving the dill and lemon a chance to dance. By adding more dill and lemon immediately, I came to regret it because it was too dilly later on, when it ripened.

Finally, I split the recipe between two seafoods. I made the “base” and then divided it in half. To one half, I added the minced salmon. To the other half, I added jumbo lump crab meat. Between the two, I much preferred the crab dip. That’s the one I tucked into immediately, with crackers. The salmon will go to work with me tomorrow, with some bagels if my co workers are lucky.

And away we go: Making the base.

Smoked Salmon and Dill with Smokehouse Pepper

Lump Crab Meat Spread with Chives


About this challenge:The Barefoot Bloggers join forces and cook or bake recipes by Barefoot Contessa Ina Garten each month, chosen in order by members, and present them for discussion on two Thursdays each month. Our Next Challenge: Ina's Smoked Salmon Spread. Hungry? Please join us at the table!

Thursday, June 12, 2008

Barefoot Bloggers: Pasta, Pesto and Pea Salad


For my first participation in the fairly new Barefoot Bloggers group, we made Ina Garten's Pasta Salad with Pesto and Peas.

I wasn't expecting this to be an interesting dish for me -- pasta and pesto and peas -- eh, it's okay. For that reason, I actually made a couple of salads tonight, to take to work for my lunch tomorrow. While I wasn't wowed by these traditional flavors, I was pleased with the result of combining traditional pesto with spinach, lemon and mayonnaise. The heavy, oily flavor of just straight pesto on pasta was made more light and lively by mixing in pureed spinach and adding a bit of lemon juice and mayo. I liked it well enough to use it as both a dressing for leaf salads in the future, and a more lively-than-pesto pasta sauce.

Original recipe here, but I modified it by removing a fair amount of the fats (I didn't toss the pasta with oil, and used much less mayo than called for, and I note most of my Barefoot Bloggers did the same), and I could easily scale the recipe down for two persons by just eyeballing it. Finally, rather than tossing it with additional pine nuts, I used chopped walnuts.

My lunch tomorrow: A trio of salads, including Shrimp Louie, Pasta with Peas, and Broccoli Coleslaw, with a few crackers and tangerines.


About this challenge:
The Barefoot Bloggers join forces and cook or bake recipes by Barefoot Contessa Ina Garten each month, chosen in order by members, and present them for discussion on two Thursdays each month. Our Next Challenge: Ina's Parmesan Chicken. Hungry? Please join us at the table!

Monday, May 12, 2008

Gotta few bucks? You could have Orange Miso Shrimp and Oyster Mushrooms, too


Dollar Store Madness! I have had a box of Contessa Orange Shrimp in my freezer for quite a while. I need to clear that freezer out (it's always overstocked) and, I was in the mood for asian food, but not in the mood to order out or spend money. The frozen brick of pre-breaded shrimp and packaged orange sauce was a Dollar Store Find earlier this year.

So let's see how a one dollar box of shrimp ends up looking as tasty as this!


Step 1: Open your box of frozen Contessa Orange Shrimp. Pan saute until browned on each side. I'm impressed so far, the breading has held up nicely.

Step 2: Add the packet of sauce. I only added approximately 1/2 of the sauce bag -- it didn't need more of that orange sauce, although it was fairly decent tasting. I did kick it up a notch by adding a good dose of miso paste, for added flavor. Quickly saute, and remove the shrimp to await plating.

Step 3: Deglaze the pan by adding water (this is my idea, at this point) and toss in some baby spinach leaves and a handful of floppy, white, tender oyster mushrooms. The mushroom vendor at my Farmer's Market doesn't like to take her mushrooms home. I've learned if you walk by her table in the last hour of the market, she'll call out "Any bag, $1.00." That's shitake, oyster, crimini -- you name it. She's never "out" so I always get a pretty bag of shrooms for $1.00.

Step 4: Plate up the shrooms and spinach, and then reach for the orange shrimp. Dummy that I am, I set them aside in a deep bowl, where they steamed and clumped together. That was not smart. Oh well. Try to separate what used to be firm, crispy, glazed shrimp, and add to the veggies, and serve.

Verdict? This $2.00 meal was really, really tasty. I was VERY surprised, and I'm also surprised that the protein count outnumbered by the fat content by a wide margin. I decreased the sugar carbs significantly by only using half the sauce, as well. I'd actually buy this and make it again if I saw it on sale. Enlarge the last pic to see tasty mushroom goodness.

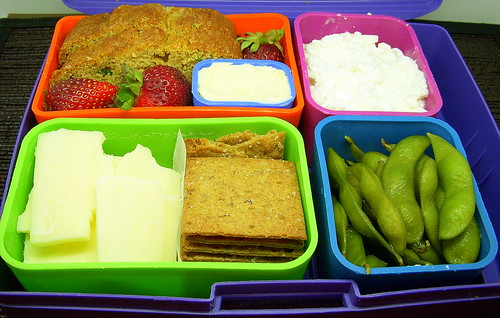
Bento Lunch: Tea Sandwich, Cheese and Crackers

Laptop Lunch 5-12-08

Zucchini Bread with Vanilla Bean Quark and Strawberries
Cottage Cheese
Sharp White Cheddar and Rye Flax Crackers
Edamame

Sunday, May 11, 2008

Zucchini Bread


I clicked through from Tastespotting (aka my Porn Site of the Day) and read Au Naturel's recipe for zucchini bread made with chickpea flour, with interest. I had all of the ingredients on hand and was eager to try baking with this unique and healthy flour. I also wanted to try, and have on hand, high fibre coconut flour, so I gave this recipe a go, with a few adaptations.


At first, tasting the mixed batter, I was nervous. It tasted odd, gamey, too chick-pea'ish. But then, as I readied the batter for baking and cleaned up before baking, I tasted the batter again. Within a minute or two, I was tasting it again, scraping the bowl clean for washing. It was growing on me, minute by minute. Very earthy, nutritious tasting. It had personality and a distinct nutty flavor.


The completed bread was delicious. It was simply more interesting than your run of the mill zucchini bread. Mine wasn't nearly as moist as Au Naturel described, but I attribute this to using the coconut flour.

Without knowing I'd be making this quick bread this afternoon, I already purchased lovely, light, tasty Vanilla Bean Quark from a Farmer's Market vendor this morning, and it was the perfect spread. I learned that quark is a European style soft whipped cheese, much lighter than cream cheese, but with a similar taste and texture. It is high protein and much lower in fat. This version was plump full of vanilla bean, and was sampled by the vendor by presenting it on a strawberry. $5.00 later, and it was mine and I was on my way home to making something with it. Turns out, it was this bread!

My lunch for work tomorrow will be tea sandwiches -- high fibre zucchini bread with vanilla bean quark -- and an artichoke from my garden. Spring is here!


ZUCCHINI BREAD with VANILLA BEAN QUARK

3/4 cup whole wheat pastry flour
1/4 cup chick pea (garbanzo) flour
1/4 cup coconut flour
1/2 teaspoon baking powder
1/2 teaspoon baking soda
1/2 teaspoon ground vanilla bean pod
1/4 teaspoon salt
1/4 teaspoon cinnamon
3/4 cup agave nectar
1/4 cup butter
2 eggs
1/2 teaspoon vanilla extract
1 cup shredded zucchini

Sift all dry ingredients (flour through salt) together, twice, to thoroughly blend, and set aside. Beat butter until light and fluffy, and add agave nectar and one egg at a time, beating well after each addition. Add vanilla extract, and beat. Add shredded zucchini, gently mixing in with a spoon. Add the dry flour mixture in thirds, stirring just until combined after each addition. Add batter to a buttered loaf pan, and bake for 40 minutes at 350 degrees.

The most significant change I made was the addition of coconut flour and using a full two eggs in my version. I did this because the package of coconut flour warned that you should only use a ratio of 20% coconut flour to regular flour, that it is very high fibre and absorbent, and will require an equal amount of liquid to help balance out that absorption which will occur during baking. By adding a full second egg, that extra moisture seemed to work just fine, but next time I'll add a bit more liquid. I also sprinkled my loaf not with cinnamon, as in the recipe I read today, but with vanilla flecked sugar, in very light amounts.

Slice when cool, and spread with quark, cream cheese, or fruit butter.

Verdict: Tasty as heck.
Skill: Easy to make, but unusual ingredients means not many will have all these things on hand.
Make again: You bet.

Thursday, May 1, 2008

Make this because it's good for you: Homemade Blueberry Orange Butter

Blueberries and Oranges are two of the world's recognized SuperFoods. I try to eat a lot of SuperFoods, at least several each day (see to the right? I even have a category for it). My sister and I just found a cookbook specifically for SuperFoods and I spotted inside a recipe for making Blueberry Butter (not dairy -- think Apple Butter). I recognized it as a good start -- a culinary canvas waiting my improvements.

First I have to give you some important warnings, before you get started. These are very important, so write these down.

~Use a pan twice as deep as you think you need. This stuff spatters up something terrible.

~If you use a wooden spoon, it will forever be purple. Use a silicone spoon if this bugs you.

~A hand blender will not work to puree the butter.

~Wear an apron. I mean it.

~Have a wet sponge and towel near by.

~Have a container washed and ready to fill when the butter is done. Unlike me.

I'm not even going to reference the cookbook or the author because I adapted it so thoroughly (the oranges and seasonings are mine for instance), they are really different animals. So, this is how we rolled in my kitchen:

Step 1: In a deeper pot than the one you see below, add one 10 oz bag of frozen blueberries (don't use wild, they actually are kinda gritty for this purpose, according to the author); one whole orange which has been peeled and de-seeded (save the peels for zest); 1 cup of unsweetened applesauce; 1 cinnamon stick; 2 shakes of ground clove; 2 big splashes of vanilla extract, and 1/3 cup of brown sugar (I used Splenda brown sugar with perfect results).


Step 2: Stir this mixture thoroughly, constantly, while the fruit boils and combines, as shown below. Cook until the fruit is combined and very soft, approximately 20 minutes.


Step 3: The recipe calls for pouring the entire thing into a blender, and then after thoroughly blended, pouring it back into the WASHED pot (why on earth would you rinse and wash away all the remnants of the fruit in the pot only to add the now blended fruit back into the pan? Lunacy). So, I took a stick blender to it. After a good 10 minutes, I realized this wasn't happening, because either my stick was underpowered for the fruit, or more likely, the pan was too shallow and I couldn't get the thing tilted enough to really mix it under the blades, without spattering everything purple all around me (See Notes: Get a deep pot, wear an apron, and have a wet sponge or towel near by). So, after 10 minutes of what you see below, I actually hauled out the full sized blender and did what I was told and it was much better. But I didn't wash the pot. I poured the fruit back into the unwashed blueberry pot.

Step 4: Continue to cook the now pureed fruit in the pot, on a heat enough high enough to pop and bubble, but not so high it boils up, or spatters too much. I had it on medium low and it simmered away, with me stirring frequently, for about 30-40 minutes. You want to be able to drag a wooden spoon (see warning note about the spoon and notice how my wooden spoon, below, is permanently a bright purple now) across the bottom of the pan and have the fruit not seep back too quickly, as shown below.


Step 5: After the fruit butter is thick and hearty, pour into a container which you have ready (See Warning Note: I didn't have one ready because I'm lame that way). I am glad I actually grew impatient and took the butter off the stove before it was as thick as I wanted -- it thickened considerably when it cooled and I could put a finger or spoon in, and it did not run off the spoon at all. This was what I wanted. Also, once it was cool, I could really taste the subtlety of the cinnamon, the clove, and the orange. Avoid overseasoning while it's cooking -- because I didn't think I'd added enough while I was tasting it during the cooking process.


Verdict: This is not like any blueberry flavored product I've had before. I'm not a huge fan of blueberries because blueberry muffins are kinda boring and I'd never eat a slice of blueberry pie. Too fake tasting. I want to get blueberries into my daily menu however, and I eat a lot of Fat Free Greek Yogurt, so I thought this was a good way to get blueberries in without too much straight blueberry flavor -- and this fit the bill. It tasted of deep rich purple - more berry than blueberry, sweet orange, clove and cinnamon and vanilla. It was not overly sweet (I didn't add nearly as much sugar as called for) and was fabulous with a big spoon of yogurt to test it out. I'm very happy with it.


If you're on a diet, dollop this Blueberry Orange Butter on:


Greek Yogurt; Oatmeal; Cereal; Toast; Granola; Cottage Cheese


If you're not on a diet, dollop this on:


Pound cake; ice cream; rice pudding; tapioca pudding; any pudding; under desserts; over desserts; or with a spoon and a can of aerosol whipped cream.

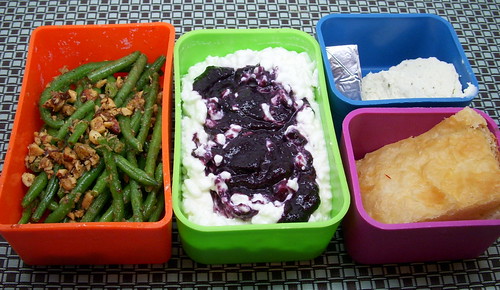
Also, because of my crappy camera skills, that photo looks like brownie batter. It's actually VERY purple, as shown on my cottage cheese bento lunch, here:


Bento Lunch 05-02-08