Showing posts with label Tastespotted. Show all posts

Sunday, September 20, 2009

My favorite salad ever: Austrian Lentil Salad

I first tasted a version of this salad in 1990, when my boss's wife, who is from Vienna, Austria, brought a large container of her version to my wedding reception, because she said it's a traditional salad to serve at weddings and promises fertility.

She was pouting when no one ate the salad. I thought "What did she expect, she brought Lentils to my wedding reception!"
Fast forward nearly 20 years, and I had a chance to eat her salad again, and my tastes have matured to the point where I thought it was incredibly tasty. I became an instant convert. I updated and significantly improved upon her recipe (she only used 4 ingredients -- lentils boiled with bay leaf, a simple herbal mustard vinaigrette, and minced onion), and now, I am never without a container of this salad in my fridge. I make it every Sunday, and it lasts all week, holds up extremely well in lunches, and fortunately, did not make me fertile, which is a very good thing, because her recipe lasted longer than the marriage.


I don't know what makes a lentil dish "Austrian" but she claims it was a childhood dish she had many times in Vienna. My version is not likely Austrian, but is certainly inspired by hers.  I use Trader Joe's ingredients primarily, which included steamed and cooked lentils, but you can easily cook your own lentils and proceed with those after you've done so.


AUSTRIAN LENTIL SALAD

Base Salad

1 package of Trader Joe's Steamed Lentils (from the refrigerated section)
1 package of Trader Joe's Beluga Lentils (from the pasta section)
1/2 very finely diced red or white onion -or- 1 shaved shallot (shown in this version)
1-2 very finely chopped carrots
Snipped Italian Parsley
The zest of one lemon (use all the juice, below)
Zest an entire lemon into a large bowl. Add both packages of lentils, the diced carrots and onions, and the parsley. Toss all ingredients thoroughly and set aside.


Dressing

The basic dressing is a lemon vinaigrette, but you should feel free to use your favorite oil & vinegar dressing, being certain to add the mucho lemon zest and lemon juice to it, to create the unique flavor. Here is my tried and true method:

1/2 cup of Trader Joe's Olive Oil
1/4 cup of Trader Joe's Seasoned Rice Vinegar (sometimes I use a bit of rice vinegar, and a bit of cider vinegar, when I want it tarter)
1 dollop of TJ's Dijon Mustard
The juice of 1 whole lemon
Salt and Pepper to taste

Combine all in a blender cup to emulsify, and pour over the lentil salad. Toss thoroughly, adjust seasonings to taste, and serve chilled. This salad requires no cooking (unless you've cooked your own lentils) keeps in the fridge all week, and makes a wonderful, healthy, high protein, high fiber very satisfying lunch.

In fact, I'd never once thought I'd say this about a salad, especially one with lentils, but I'll stand in front of my open fridge door at night and eat this salad right from the container, with a spoon. If I worked at a TJ's, I would make this easy dish and demonstrate it, to convert people to the wonder of lemony lentils as a salad.


Personal note to my sister, Weezie: Aren't you proud of me?! I finally figured out a use for my obsessive acquisition of vinegar and oil even though I've always hated oil & vinegar dressing!

Wednesday, September 9, 2009

Does anyone else think the grilled meat ad on Tastespotting looks revolting?


Is it me, or does the advertisement on Tastespotting for El Patron Tequila show the most unappetizing piece of grilled protein -- whatever it is -- maybe ever? I don't think one could drink enough El Patron to make that -- thing -- look tasty.

Dear Tastespotting:

Love the site you guys (even though you've rejected every single entry I've submitted after the site was relaunched, but published lots before the relaunch), but that ad is just HORRID. I can't tell if it's a piece of grilled fat, meat, road kill, a split open rattle snake (or worse, something Bobbitt like ::shudder::).

Tastespotting, please don't make me look at the ugly meat anymore.

If you are honest with yourselves, you know damn well you would have REJECTED that as a photo submission from any one of us, stating "Unflattering Composition; Not Sharp." Don't you even try to deny it.

You should make the sponsor drink some of their product and replace that ad photo with one of a grilled taco or something -- with identifiable meat cooked past 165 degrees to avoid the cooties crawling all over the undercooked meat in that unflattering, unsharp, low contrast, photograph.

xox
Kate

.

Monday, July 6, 2009

Ginger Pear Mint Elixer

This was inspired by a smoothie cookbook I recently found, rather dated, but which has far more interesting combinations than usual (forget the banana orange strawberry surprise, this book uses everything from tapioca to quinoa to figs). This my adaptation of one recipe that was based on ginger and pear:

Ginger Pear Mint Elixer

3 canned no-sugar pear halves
Ginger Juice
Mint Leaves
Almond Milk
Club Soda
Sweetener

In my bullet blender cup, I filled it half with ice, and then 3 pear halves, two mint leaves from my own garden, a splash of ginger juice (or you could use ginger powder or fresh ginger), a splash of almond milk, and topped it off with club soda. I added 2-3 drops of sucralose no-calorie sweetener, and blended.


Very refreshing and cool on a hot summer day. Ginger and pear are soothing to the stomach and digestion. Of course I think this would be much improved by using Asti Spumanti or champagne in place of the club soda, but that would detract from the so-called restorative factor.

That's my ground floor kitchen window. It faces a parking lot and the lot's water hose is under my window. I don't like lookie loos so I swirled clear glass paint on it for privacy, but still lets the light through. Looks pretty darn cool, I think.

Monday, June 15, 2009

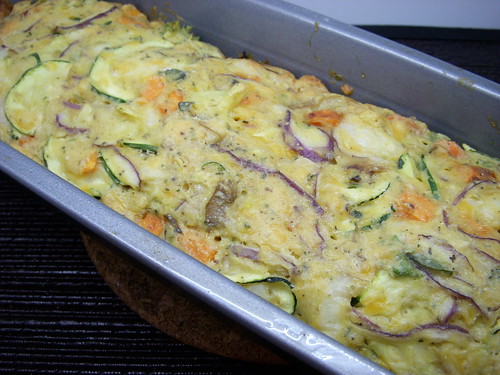
Hippie Quiche: Zucchini Cheese Pie Bake

Zuke Pie Whole

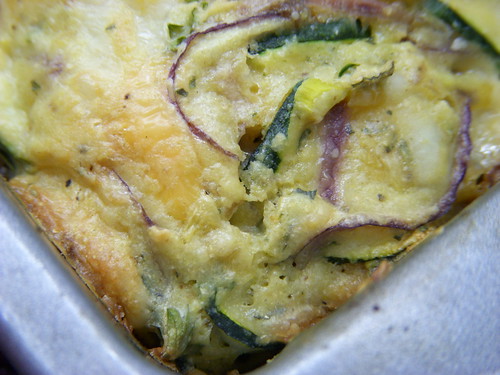
Zuke Pie Macro

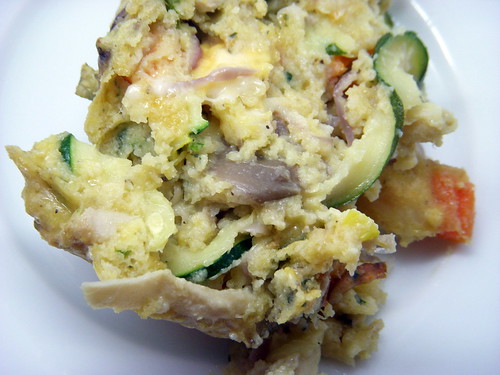
Zuke Pie Steaming and Ready to Taste

This is a recipe for Zucchini Pie by my pal Liz in New York, who bakes it and serves it in her bento box lunches quite frequently. It's a cross between a veggie loaf and a healthy quiche. Since I made chick pea flour zucchini bread earlier in the week, I had another zucchini waiting to be used, more chick pea flour of course, and her recipe in mind. I'm finding the chick pea flour really tasty, and the high protein and fibre is an added bonus.

This would be both a good vegetarian main dish and a good side dish as well, actually. I served it with a piece of grilled rainbow trout, so this acted as my "vegetable stuffing on the side." If you're planning to grow zukes in your garden this year, take note. This will help use up your bounty.

This is a hard to fail recipe. She uses more or less cheese depending on what she has, more or less veggies, depending on what she has, and less oil. You really just need enough liquid to bind the batter together. When it looks gloppy and moist and the veggies are coated, it's ready to go into the oven. This is what I put into mine:

CAN'T SCREW IT UP ZUCCHINI PIE

1 large thinly sliced zucchini
1 grated carrot
1 small onion chopped
1 small diced yam
1 handful of torn oyster mushrooms
1/3 cup whole wheat pastry flour
1/3 cup fine ground corn flour
1/3 cup chick pea flour
1 cup grated mild cheddar cheese
1 rogue slice of Lite Jarlsberg cheese from the deli drawer
1/4 cup canola oil
2 egg whites and 1 whole egg, beaten
1 handful of grated parmesan
1 handful of chopped fresh herbs (I used basil, parsley, thyme, oregano and chives)
1 teaspoon baking powder
A few liberal shakes of Penzey's Sandwich Sprinkle and Mural of Flavor seasoning (basically more herbs and garlic salt)

Preheat oven to 350 degrees. Combine all ingredients in a large bowl and mix well. Spoon zucchini mixture into a 10 inch glass pie or quiche plate that has been coated with vegetable cooking spray. I used an IKEA loaf pan -- they are quite longer than your average loaf pan by a wide margin so it spread out as shallow as a pie pan and worked fine. Bake for 45-50 minutes or until golden brown. Cool for 15 minutes before slicing.

Wednesday, January 28, 2009

Best Breakfast Burritos EVER

I love this breakfast burrito so much, I've had it for dinner three times in the past week. It's so delicious, so simple, and so fast, it's my current love. I was inspired by the version made by Muneeba at An Edible Symphony, because as soon as I saw it, I knew it was the answer to what I disliked most about most breakfast burritos: The over-cooked scrambled egg and often greasy breakfast meats. I love the concept of a breakfast burrito, but I often dislike the end result for those two reasons.

As soon as I saw Muneeba's version, I smacked myself in the head and said "Of Course, use a softly fried egg, don't use a scrambled egg, silly, and that problem is solved! Who told you they have to include scrambled eggs?"

I had all the ingredients I needed on hand, and set to work.

Above: For my version, I started with a fresh tortilla, from dough. My local Costco sells the uncooked tortilla in paper thin sheets. The only require a quick heating (perhaps 1 minute or less per side) in a dry skillet to cook. Naturally, you can use a plain, cooked tortilla, but do heat it first, in a dry skillet, so that it warms the ingredients as you build. Here, I just place the uncooked tortilla in a pan, no butter or fats required, and turn it on high. Note it is slightly translucent.


Above: In about 30 seconds, the tortilla begins to puff, and turn white as the dough cooks.


Above: When the first side is browned and bubbly, turn it over with tongs and cook the other side very briefly, perhaps 15-20 seconds. The second side should be less brown -- we're going to be working on that side again in a little bit, below. Keep your pan warm, but not hot -- you'll need it again in a minute.

Above: Lay the tortilla on a paper plate or towel, and on the darker, more grilled side of the tortilla, quickly spread a thin layer of cilantro dip and sprinkle with shredded cheeses. Mine is my favorite -- Trader Joe's Roasted Pecan Cilantro Dip (basically a cream cheese and cilantro spread). Muneeba's version used Cilantro Chutney. I have that as well, but this dip is my preferred taste -- it's milder.

Above: Add another layer of your preferred toppings. Here, I used just a scattering of black beans, and a scattering of diced green onion. You could certainly add Spanish rice here, or avocado slices, or even shredded pork or carnitas. Here, I'm just keeping it simple to show you my base burrito. Set this stage of your burrito aside, and return to your warm pan.

Above: Lightly butter the skillet and softly fry an egg. You want the whites cooked gently, and still a somewhat loose yolk (but no runny whites, yuck).

Above: Just before it's ready to come out of the pan, I quickly break the yolk with just a swirl or two. I don't want it hard or cooked through -- I just want the yolk to be more evenly distributed with the egg white. Keep the pan warm, but not hot. Do not wipe it out.

Above: Quickly slide the egg from the pan onto your waiting tortilla. All photos from this point forward will be blurry because I dropped it right in my egg yolk! I tried to get the yolk off the lens. I think I need a q tip and alcohol.

Above: Fold up the sides and roll up like a burrito.

Above: Place the rolled burrito back in the warm pan, and using the trace amount of fat still left, begin to brown/crisp the outside of the burrito. Remember I told you that I spread the dip and toppings on the browner of the two sides? That's because when it goes into the pan again to warm up, the less brown side will catch up. This also helps melt the cheese a bit inside, and finishes cooking the soft egg.

Above: Slice in half, take a bite, and enjoy the best, most flavorful, unique, and definitely NOT greasy and heavy, Breakfast Burrito.

Thursday, January 22, 2009

Barefoot Bloggers: Easy Sticky Buns


This week on Barefoot Bloggers, we made Ina Garten's Easy Sticky Buns, as chosen by Melissa of Made by Melissa. This recipe was so fun, and so easy, and so tasty, I'm surprised it never occurred to me to try it before. This recipe and method is a natural for any kind of breakfast pastry. I can easily see substituting dried cherries and crushed almonds for Cherry Almond Pastry, or perhaps Maple Butter and Pecans. The varieties you can use are numerous.

As with all Ina Garten recipe, butter figures prominently. I didn't follow any of the recommendations for amounts. Because the *base* for this recipe is puff pastry, which by itself is quite fatty enough, I just used the *idea* of her recipe, and adapted accordingly as I went along, using far less butter.

These rolls were superb! I was particularly happy that the butter melded with the dough to create a more traditional feeling dough, rather than a shattery-flakey roll that disentigrates when you bite it. These held together nicely. It would be very easy to make these rolls, cut, and freeze the cut rounds for baking off on rushed mornings.

Butter and brown sugar is combined to make a loose slurry.

A dollop of the sugar butter is placed in the well of a cupcake tin. I only used six wells, because I only used one square sheet of pastry from Trader Joe's. Pecans are sprinkled over the dollops of sugar butter, and the pan is then set aside.

One sheet of puff pastry is spread thinly with melted butter, onto which cinnamon and sugar are sprinkled. I also added a bit more brown sugar, as well as more pecans.

The pastry is rolled up, jelly roll style, to make a log.


Ina's recipe calls for cutting off the ends and discarding them. How silly and wasteful is that? (said in her own style). Puff pastry melts, spreads and puffs, so trimming uneven ends is completely unnecessary. Cut the log into six equal pieces.


Place one roll on each dollop of sugar butter, in the cupcake pan. Bake for 30 minutes until the roll are well browned and caramelized.
Cool for a few minutes, and turn the rolls out onto a sheet pan lined with parchment. Serve while still warm.


Devour!

About this challenge: The Barefoot Bloggers join forces and cook or bake recipes by Barefoot Contessa Ina Garten each month, chosen in order by members, and present them for discussion on two Thursdays each month. Hungry? Please join us at the table!

Saturday, January 10, 2009

Leek and Carrot Mashed Potatoes with Pot Roast on the Side


The simple supper above, Pot Roast with Mashed Potatoes, and caramelized Leeks and Carrots, has spawned the best potatoes, EVER. What you see above was night one: I had a small knob of pot roast, cooked, to defrost and eat for supper, and a frozen bowl of leftover mashed potatoes. Perfect comfort food for a cold and foggy night. Brrr. I quickly heated the pot roast and potatoes, but I wanted the traditional veggies with it. I quickly shaved a carrot and a pre-trimmed and cleaned leek with a handheld mini mandolin (a $1.00 gadget from Daiso Yen Store in San Francisco -- the most beloved tool in my kitchen) into paper thin pieces, and roasted them with garlic butter in order to serve them along side my supper.

As I began eating, I quickly gobbled up the roasted veggies and ignored the pot roast. They were crispy and delicious. On top of the potatoes, they were sublime. This gave me the idea to recreate the specialty mashed potatoes -- Mashers with Leeks and Carrots -- the next night.

On night TWO, below, I mixed it up and the pot roast became completely secondary.

It was Potato Night! They were, in a word, spectacular. That's why it became "pot roast on the side" because by then, roast-schmoast. Pass the potatoes!


Using my mandolin, I shaved one leek and one carrot, paper thin, and sprinkled with seasonings, a knob of garlic butter, and a splash of olive oil.

I roasted the veggies at high temp until they were golden brown, black in some parts, and the leeks were crispy.

I heated and stirred my mashed potatoes until they were creamy and warm, and then gently folded in the veggies, mixing, but not beating or being too harsh, because I didn't want the veggies to break up. I wanted them to nestle inside the potatoes. And, just because I used butter and oil on the veggies, is no reason not to add more butter on top of the finished product. Whatyoutalk? Above, a macro shot of the best potatoes on the planet. I mean it. Serious, SmackDown Good.

Another shot, just because.

And another shot, with thyme, just because. Because it's so damn good. Make some and call them Kate's Potatoes. You'll thank me.

Monday, October 6, 2008

Blackberry Crostata with a dab of cream


Happy Monday, ya'll. It's cooling down up here in Northern California (we even had the slightest little rain shower this weekend, which was so pleasant), and my desire to hunker in and bake and roast is returning.

The urge to stock up on pumpkins, cake flour, nuts, fruits, spices and everything you need for a Fall Baking Frenzy is strong, but I remain committed to cleaning, organizing and using up the contents of my TWO (yes, 2) freezers: One in my fridge, and one stand-alone chest freezer.

This weekend I found a box of Trader Joe's unbaked pie crusts in my chest freezer, from last season, and the remnants of a bag of frozen raspberries. In my fridge I had a container of fresh blackberries going wonky, and voila -- all three ingredients called for a free form crostata.

The cons -- I didn't like and won't purchase the pie crust again. I know a pre-purchased pie crust isn't ideal and will never beat a scratch pie crust, but I know myself. I will not make and roll out pie dough for just one person. I'll do all sorts of specials things for myself (important for the solo diner, I believe), but scratch pastry has never been one of them. Even Pillsbury makes a better pre-purchased pie crust dough than this, which had no flake to it at all, and was akin to a giant biscuit.

The pros -- the dessert itself was simple, fast, and I think, with some decent dough on hand, I'd make a rustic crostata over a traditional pie every time. I like the rough, free-form nature of it, and the thin end-result delivered an excellent fruit-to-crust ratio (you'd think with as much as I love crust and demand a 50/50 ratio to fruit, I'd make my own, and yet ... )

Of interest, I had a bunch of those little packets of True Lemon and True Lime (pure powdered citrus in a single-serving small packet) which the manufacturer sent to me to sample in relation to a healthy cuisine food project I was working for, and I've been trying to use them up. Typically I use them in my morning fruit smoothies. The pure and intense citrus flavor adds that missing ingredient -- a tart puckery zing -- which always separates a home smoothie from a Jamba Juice smoothie. But I digress.

So I had the packets of True Lemon and decided, what the heck, I'm already mixing flour and sugar to toss with the berries, and it calls for lemon juice as well, so I made a flour mixture of a few teaspoons of sugar, a few teaspoons of flour, and one packet of True Lemon powder. Tossed it all, added the berries, and baked. The fruit mixture was excellent. Tart, sweet, tangy, no artificial flavor at all. I'd do that again, definitely.

In fact, since True Lemon and True Lime are pure (or so they promise me), I'm thinking it would be very simple to have a small container of citrus sugar available for baking and rimming glasses. I'm not advocating not having fresh lemons and limes on hand at all times -- actually I do. I love the zest. But an always-available lime or lemon sugar rim on a cocktail? Laws yes.

Finally, the cream. I really love heavy cream and whipped cream, and I prefer it unsweetened. Just the smooth texture and creamy taste is all one needs -- skip the sugar the next time you whip cream and see if you agree. I didn't even bother to whip the cream, for this crostata. I just drizzled a teaspoon of real cream over the berries and it was perfect that way.

TWO BERRY CROSTATA

1 layer of your favorite pie crust -- purchased or homemade
2 teaspoons of flour
2 teaspoons of sugar (I used vanilla sugar)
1 packet of True Lemon or 1 teaspoon of lemon juice
1 cup of blackberries
1 cup of raspberries
Turbinado Sugar
Orange Juice or Egg Wash

Spread pie crust over a skillet, baking pan, or pie dish (I used a cast iron griddle). Mix flour, sugar and 1 packet of True Lemon in a dish. If using lemon juice, do not add at this point -- reserve. Sprinkle a bit of the flour-sugar-citrus mixture over the center of the uncooked pie crust, and brush it slightly to evenly cover the crust, leaving a wide margin all around. Toss the berries with the remaining flour-sugar-citrus mixture to coat evenly. Pile the berries in the center of the pie crust, smoothing out slightly to leave a several inch margin all around. If using real lemon juice, sprinkle it over the berries at this point. Fold up the crust over the fruit, leaving the center exposed, but pleating the dough to form a barrier. Brush the crust with orange juice or egg wash (I used orange juice), and sprinkle with turbinado or coarse sugar. Bake until well browned and bubbly, at a temp and for a duration suitable for your own oven. Slice, serve with a teaspoon or heavy cream on each slice.

Sunday, June 29, 2008

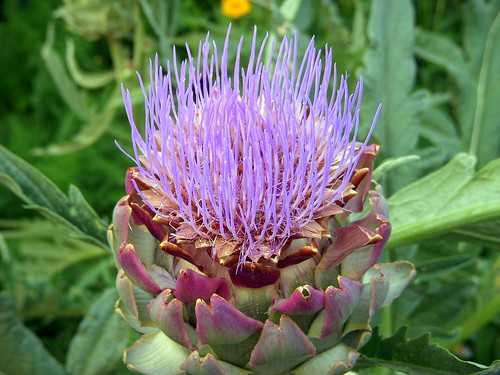
When you don't pick your artichokes in time ...


... you get these beautiful thistle flowers. From my community garden plot. Now sitting in a vase.

Monday, June 9, 2008

Coriander Chicken

This is a simple supper adapted for one or two persons, from Best Ever 30 Minute Cookbook by Jenni Fleetwood. Simple, tasty and fast. Coriander / Cilantro Haters -- look away now before you are traumatized.

Step One:

Pound out a chicken breast to desired thinness, and add to a hot pan with a bit of olive oil and butter. I like mine particularly thin because a) it cooks more quickly and b) it gets nice and chewy. I'm not a fan of wet or moist chicken. As the chicken breast is cooking ...

Step Two:

... I heat a pannini press that I found at a garage sale for a buck. I use it to weight down just about anything I want flat in a pan, from sandwiches to bacon. This is optional of course, but by heating it on that back burner you see peaking out back there, and placing it on the chicken, it browns evenly and ...

Step Three:

... develops these nice grill marks which are more attractive in pan fried meats. Get your chicken nice and sizzling, and then ...


Step Four:

... begin to break it up with a sharp knife and fork. Yes, you could dice it up in advance, but I like to shred my chicken AS it cooks in the pan, and not before, because it gives more interesting shapes, different sizes and textures, chewy brown edges and bits and pieces, and prevents it from looking like those uniform chunks you see in a can or frozen meal.


Step Five:

Now, add a knob of creme fraiche. I used a little over 2 tablespoons, and added it right to the pan. I should have scooped out a bit more of the olive oil than I did -- I had a bit too much for my liking. Act accordingly. Begin to stir right away to melt it and ...

Step Six:

... quickly add a big handful of chopped cilantro, stirring quickly to wilt.


Step Seven:

If you take the pan off very quickly, you'll have a somewhat creamy sauce. If you leave it a moment or two and really melt and wilt the creme and cilantro, you'll see it disappears into a rich, buttery tasting fat, like this, below. Grind fresh salt and pepper over all, and serve hot.

Thursday, June 5, 2008

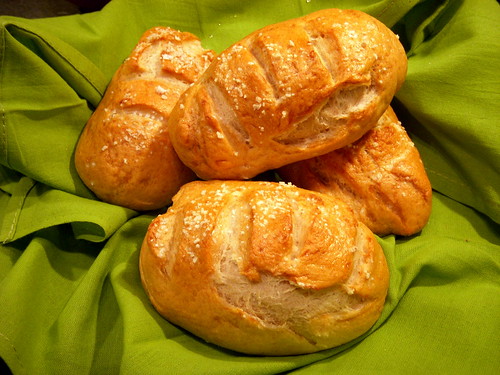
Pretzel Bread Baguettes


I saw sandwiches tonight at My Sweet and Saucy, and I instantly wanted to crawl through my screen and eat them. The post reminded me that I've been meaning to bake a batch of pretzel bread which I saw on another blog not too long ago. It will have to do. It will have to do.

Pretzel Bread / Baguettes (Small Batch)
Makes 4 Medium Sized Pretzel Rolls

Pretzel Dough:

2-3/4 cups bread flour
2-1/4 teaspoons rapid-rise yeast or SAF instant yeast
1/4 teaspoon salt
1 teaspoon sugar
1 cup hot water

Water Bath:
1/4 cup baking soda
2 tablespoons sugar

Topping:
coarse sea salt
egg white

I adapted this recipe from Desert Candy, to use my bread machine, which calls for adding the dough's liquid ingredients first, followed by dry, yeast on top. I set it to "dough only" and let it knead and rise first in the machine, and then removed it to a pan lined with parchment. I slashed into the bread dough with scissors, covered, and let rise again for approximately 15 minutes while I prepared the water bath. I brought a soup pot of water to boil, and added the baking soda and sugar when I was ready to add the rolls. Boiled the rolls on each side for 30 seconds (they float, so flipping is in order).

Removed to a pan lined with parchment paper, brushed with egg white, and salted. Baked at 375 for 30 minutes.

I found them to be quite tasty, but not as "pretzel tasting" as I would like. Very good, make no mistake (all homemade bread is good), but not quite what I'm looking for yet. I thought they were more like bagels than pretzels, and the baking soda flavor was more pronounced than I anticipated, so perhaps I added too much or the ratio of water to baking soda was off. Still, I have a chicken breast roasted and this will make a lovely sandwich tomorrow.

The action shots:


Monday, May 12, 2008

Gotta few bucks? You could have Orange Miso Shrimp and Oyster Mushrooms, too


Dollar Store Madness! I have had a box of Contessa Orange Shrimp in my freezer for quite a while. I need to clear that freezer out (it's always overstocked) and, I was in the mood for asian food, but not in the mood to order out or spend money. The frozen brick of pre-breaded shrimp and packaged orange sauce was a Dollar Store Find earlier this year.

So let's see how a one dollar box of shrimp ends up looking as tasty as this!


Step 1: Open your box of frozen Contessa Orange Shrimp. Pan saute until browned on each side. I'm impressed so far, the breading has held up nicely.

Step 2: Add the packet of sauce. I only added approximately 1/2 of the sauce bag -- it didn't need more of that orange sauce, although it was fairly decent tasting. I did kick it up a notch by adding a good dose of miso paste, for added flavor. Quickly saute, and remove the shrimp to await plating.

Step 3: Deglaze the pan by adding water (this is my idea, at this point) and toss in some baby spinach leaves and a handful of floppy, white, tender oyster mushrooms. The mushroom vendor at my Farmer's Market doesn't like to take her mushrooms home. I've learned if you walk by her table in the last hour of the market, she'll call out "Any bag, $1.00." That's shitake, oyster, crimini -- you name it. She's never "out" so I always get a pretty bag of shrooms for $1.00.

Step 4: Plate up the shrooms and spinach, and then reach for the orange shrimp. Dummy that I am, I set them aside in a deep bowl, where they steamed and clumped together. That was not smart. Oh well. Try to separate what used to be firm, crispy, glazed shrimp, and add to the veggies, and serve.

Verdict? This $2.00 meal was really, really tasty. I was VERY surprised, and I'm also surprised that the protein count outnumbered by the fat content by a wide margin. I decreased the sugar carbs significantly by only using half the sauce, as well. I'd actually buy this and make it again if I saw it on sale. Enlarge the last pic to see tasty mushroom goodness.