Showing posts with label Hearty Suppers. Show all posts

Tuesday, September 22, 2009

Braised Pork Shoulder

There was a time I used to keep The Food Channel on my television for most of the weekend, during the day. I loved it so much, I'd also watch a few episodes more than once. Back then, Unwrapped was still fascinating, I wasn't yet sick of "BAM", and Anthony Bourdain was still on the line up.

Over time, I've become disheartened by how much the network has changed from a "Chef Based" cooking network to a "Food as Entertainment" network. The same tired things get shown over and over again, the great chefs are gone, and Unwrapped is a bore.

Little by little, I just stopped watching and it occurred to me, recently, that I bet I've only turned it on perhaps once or twice in the past year. In fact, the last thing I remember turning in to watch was the very first second (thanks Deb!) season of The Next Food TV Star and I remember wanting that sweet guy (Reggie?) from a Los Angeles Bakery to win, but he lost to Guy Fieri (who in retrospect, although I can't abide watching him gorge his face with food [honestly, must he use his mouth as a back-hoe?], was probably the better choice). How long ago was that, a couple of years at least?

So, it was surprising to me that I was channel surfing the other night and stopped to watch a young woman prepare a simple and inexpensive Braised Pork Shoulder, and I didn't turn the channel. That's very rare these days. It really did look very easy and tasty, and I thought to myself, as I watched "First, I'd like to make that this weekend, but Second, someone needs to show her how to properly use a knife. It's as if she's never learned." I had no idea who she was until I went online to download and prepare the recipe.

The coincidence is, that she is Melissa d'Arabian who apparently is the most recent winner of that same show -- The Next Food TV Star -- and she is not a chef, which explains her less than polished performance and lack of knife skills. The Braised Pork recipe has all five star reviews from the new fans of her show, Ten Dollar Dinners, so I made it and pronounce it excellent. So fast and easy, really economical without tasting like it, and it reminded me that having a cast iron dutch oven is such a good thing. I need to use it more often.

The complete recipe is here. I'd add less wine next time -- my red wine had too much personality. My progress photos are shown below:


Rough chopped celery, leeks, onion, carrots, and garlic cloves.


A pork shoulder, which cost only $4.85 for the entire package (several pounds), was cut into hunks, seasoned, and seared in a cast iron dutch iron. Mmmm, seared pork.


Those babies came out to rest after just getting browned on the outside. I picked all the crispy bits off and ate them. So good.


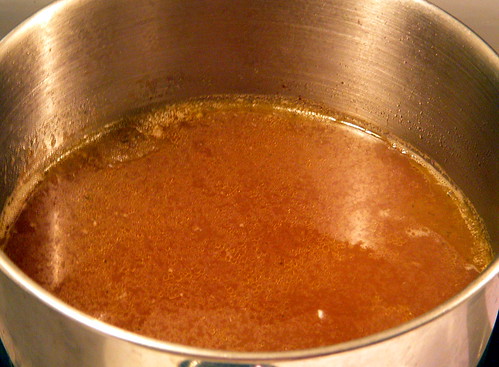
All but a few teaspoons of the pork fat was drained off, and I added the veggies until they were soft, and then added stocks, seasonings, bay leaf, etc., and brought to a boil.

The seared pork shoulder was nestled back down into the vegetable stock.


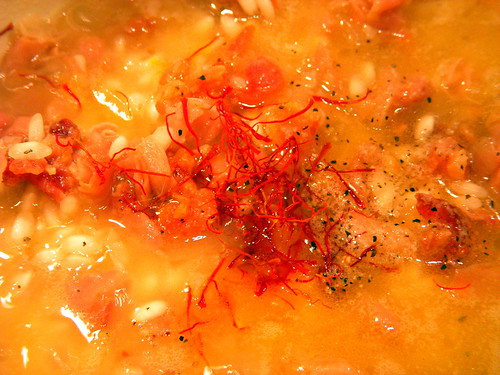
Three hours later, I had some beautiful braised pork shoulder and lots of stewed vegetables.


It was pull-apart with a fork tender. After we had pork shoulder and veggies, we pulled the rest of the pork into the shreds and kept that for sandwiches and other dishes. Excellent. Congrats, Melissa!

Tuesday, March 3, 2009

Pork Hominy Stew


I am so lame for making this post.

This Pork Hominy Stew is the best thing I've made all year. A stew of hominy, leftover shredded pork, tomato, an entire bottle of Dark Ale, carrots, onions, a bunch of salsa from Trader Joe's, cilantro and garlic up the wazoo. It was actually very easy, and I can probably never duplicate it exactly because I was just pitching stuff from the fridge into the pot, and this is what I got. Absolutely fantastic. I'm sorry it's almost gone!

I also came to a realization with this soup. While I detest drinking beer and ale (yuck, I don't want to drink anything that requires me to acquire a taste for it), I LOVE cooking with it. Why is that? Why do I love beer and ale based entrees, but dislike it as a beverage? Dunno.

And why is this post lame? Because while I did take notes, I don't have a recipe for you yet. I shouldn't proclaim this to the best thing I've made all year, and then just make you sit here and look at it, but, that's exactly what I'm doing so I can organize my photo uploads.

I'm good at soup, always have been. When I get off my ass, I'll type up the recipe as close as possible, for future generations.

Use it up points:

Off the charts, it was a frenzy of pitching things in from the fridge and pantry.

Monday, February 16, 2009

Happy Family Baked Beans


You know those entrees Chinese restaurants that say Happy Family Noodles? They are usually the entrees that a bit of everything -- fish, beef, chicken and veggie. One big happy family.


This bean recipe doesn't have any seafood, but it has everything else under the sun, and, because it's a Clean Out the Freezer Recipe, there really isn't one, and I'll never be able to make it again.


It all started with a book I received this week in a swap, about military wives and their cooking habits, with lots of stuff by Libbie Custer (wife of Custer of Custer's Last Stand fame). One recipe caught my eye, from a present day military wife, who made baked beans everyone raved over. All she did was bake her canned beans with crumbled cooked sausage and cut up BBQ chicken from other recipes, and I thought "Well heck, that's easy and good, but does it really need a recipe?"


I had many, many little baggies and parcels of protein sources, and some veggie leftovrs. I'm forever making meat entrees and then freezing little parcels for later, and I end up with lots of little leftovers.


This is the original recipe:


Prairie Baked Beans


2 cans of baked beans, one drained, and one with liquid

1 cut up BBQ chicken breast

1 cup cooked breakfast sausage crumbles

1/4 cup of bbq sauce


Drain one can of beans, add both cans (one with liquid, one without) to a pot, add meats and sauce, and bake until hot and bubbly.


This is what I did with the beans...


Happy Family Baked Beans


1. In a small casserole pot, I emptied one regular size can of Trader Joe's fat free baked beans, with liquid.


2. I added a big handful of chopped, leftover, pot roast from this dinner.


3. I added lots of chopped, leftover Rotisserie Turkey Breast from Christmas.


4. I added a small handful of chopped, leftover grilled steak.


5. I added a handful of pre-cooked bacon crumbles from Costco.


6. I fried up and added one turkey sausage patty, crumbled into bits


7. I added the last bit of my pre-cooked, ready and waiting mirepoix from this post.


8. I added a several glug-glug-glugs from a bottle of Steak Sauce (I didn't have BBQ sauce)


9. I added several shakes of Penzey's Northwoods Seasoning, lots of ground pepper, a glug-glug of ketchup, and baked it for one hour.


I ate all of it within 24 hours -- a few spoonfuls at a time, about 2-3 cups worth. It doesn't look like much, but it was fantastic. It was really hearty, more meat than bean, pretty high in protein all things considered, low in fat all things considered, and really comforting on this rain-with-hail weekend.


Thursday, February 12, 2009

Barefoot Bloggers: Real Spaghetti and Meatballs. Without the Spaghetti. Or the Meatballs.


This week, the Barefoot Bloggers are making Real Spaghetti and Meatballs, as chosen by Rebecca of Ezra Pound Cake.

I made more than the average number of substitutions with this one, simply because this isn't the type of recipe easily adapted by or useful for the solo diner. I have to want to eat an entree all week (leftovers, lunches) when I make it, and with a recipe like this, you have mega leftovers, so you'd better LOVE it. I don't *love* spaghetti and meatballs. In fact, I don't make much pasta.

I've never made my own pasta sauce, though, so thought it was time I learned, so I adapted the Ina Garten recipe for sauce and meatballs, and elected to make smaller portions of it just for a meat sauce. In addition, one of the first recipes I made as a Barefoot Blogger was for Pesto and Peas Pasta Salad, and I still had half a box of the bowtie pasta left over, and wanted to get rid of that, so here it is, a recipe for Ina Garten's Spaghetti and Meatballs.

My substitutions:

I used bowtie pasta from the BB pesto salad event
I used loose angus ground beef and italian sausage
I stirred in two tablespoons of heavy cream to the sauce, just before serving.


I thought the sauce was better than jarred, of course, but it wasn't so great I'd make it a go-to recipe. This is simply because I'm not a frequent pasta eater and when I do have it, I don't tend to order or eat much in the way of tomato based sauces. In fact, I often have it left off the pizza, as well. That's why I added a few tablespoons of cream, to make it more of a creamy bolognese sauce, which I liked *much* better. What doesn't cream or butter improve?

Still, it was tasty and I'm glad to have made it.

About this challenge: The Barefoot Bloggers join forces and cook or bake recipes by Barefoot Contessa Ina Garten each month, chosen in order by members, and present them for discussion on two Thursdays each month. Hungry? Please join us at the table!

Monday, February 9, 2009

Chili and Cheese


Don't be hating on my cell phone photo. This was from early 2007 and I didn't own a camera back then. Not that having one now has taught me much.

Anyway, I'm recycling some Bento Lunch posts I made long ago on Flickr so that I can group together recipes that are in my regular rotation. This recipe was the first time I was ever moved to make my own chili, and I was so glad I did. It was very unique, and is very tasty.

So about my lunch:

This Mr. Bento Jar toted the day's vittels:

A bowl of chili
A bowl of shredded cojita cheese for the chili (looks like rice, but it's cheese)
A tiny dish of wasabi peas (vegetables!)
A tiny dish of toasted corn kernals (vegetables!)
Mandarin sections
Cucumber slices with sesame seeds
Sugar free egg nog taffy.

I can tell this was from those days when I cut my cucumber slices all purty like and arranged my fruit slices "just so." That isn't the case anymore. I just combine good colors and tasty things. To heck with the cute shapes.

I've misplaced the link to the chili recipe but I think it's from "Half Assed Foodie's Mom" so shout out to her. Found it! Mom's chili by Random Dictates of a Half Ass Foodie!

Here is her Mom's recipe:

HALF ASSED FOODIE'S MOM'S CHILI

1 lb. hamburger
4 pcs bacon, chopped
1/2 ring Portuguese or Keilbasa Sausage
1 clove garlic, crushed
1 small onion, chopped
1 can kidney beans
1 can condensed tomato soup
1 T chili powder
2 T brown sugar
1 t curry powder
dash of salt

Fry hamburger, bacon, sausage, garlic and onion. Add kidney beans, tomato soup, chili powder, brown sugar, curry powder and salt. Simmer for 1 hour, stirring occasionally. Serve over hot rice.

I didn't serve over rice, I used Brown Sugar Splenda, and for the sausage, I used linquica. EXCELLENT.

Tuesday, February 3, 2009

Quesadilla Casserole

We're using up some pantry supplies tonight, whipping up a casserole of Tex Mex flavors and emptying the larder at the same time. I wanted to try a new salsa I found at Trader Joe's -- Salsa del Cabo. It's very different in appearance -- very dark brown (almost black, really -- my camera makes it more brown/orange than it actually is). Quite tasty, with a deeply "roasty" flavor, not very hot at all (which I prefer).


So this is what we're hacking tonight: A can of Amy's Organic Black Bean Chili, a bit of tomato sauce, some green chilis, and some canned black beans (not shown).

I wanted a refried bean texture, but had no refried beans, so I whirled the can of black bean chili in a bullet blender cup with about 4 oz of tomato sauce. as well generous amounts of cumin, cilantro, garlic, and chili powder, until I had a thick, creamy, spreadable "bean dip."

Meanwhile, I sprayed a deep cake pan with vegetable oil spray.
In the cake pan, I layered one flour tortilla (directly from my freezer, actually), spread it with my bean dip, scattered more black beans, and sprinkled it with cheese. Oh darn! Typing this, I see I forgot to use my fresh green onions. Oh well.

Repeat. Layered another tortilla, more dip, beans, and cheese, and repeated it for three full layers.
On the top layer, I scattered the most amount of cheese to create a crust.

I baked in a preheated oven for 30 minutes at 350 degrees.
Cut into wedges, topped with a dollop of sour cream, a dollop of guacamole, and a spoonful of Salsa del Cabo.
Quite tasty! The tortillas went in frozen, but cooked well and were crispy on the edges. I'm hoping this holds well for lunch tomorrow. This happens to be a vegetarian version. It would adapt well to add anything you wished, including rice, meat, avocado, and more.

Friday, November 14, 2008

Roasted Butternut Squash with Crispy Sage and Italian Sausage


I was inspired by Dragon's incredibly easy dish of Roasted Butternut Squash with a Sage and Balsamic Glaze, and had all the ingredients on hand. Always a nice moment when you know you can get up, go to your kitchen, and recreate someone's recipe. I wanted to add a bit of protein and make it a full meal, rather than a side dish, and after oven roasting a piece of Italian Sausage, and dicing it onto the dish, I had it. Delicious! Thank you Dragon.

Thursday, October 9, 2008

Barefoot Bloggers: Butternut Squash Risotto

Butternut Squash Risotto, Step 11

I had mixed feelings about this month's selections for the Barefoot Bloggers. The first of two selections is Ina Garten's Butternut Squash Risotto as chosen by Rachel of Rachel Likes to Cook, from the Barefoot Contessa Family Style cookbook.

Oh, I was quite certain the risotto would be delicious, and I love, love, love squash. It's hearty fare, perfect for Autumn, but it's still rather warm here in Northern California, I've been working my butt off at the office, I'm cranky and tired, and I admit it ... the few times I've had risotto, I truly never understood what all the fuss was about. A fancier rice pilaf! I knew, however, I wasn't having it served under ideal conditions. The first time I had it, it was from a mix. From Target, no less. The second time I had it, it was from Whole Foods' hot dinner case, and it was hard and dry. The third time I had it, it was "to go" from a nice restaurant. It's not the kind of thing that travels well and it was just thick, heavy rice pudding when we got it home.

Honestly though, the primary reason for my reticence was simply that I've never made risotto from scratch and the thought of it intimidated me. Still, that's what these blogging groups are all about, creating dishes out of our comfort zone, with the ideas from and support of my fellow bloggers.

Having now completed the task, and I made it as close to the recipe as I possibly could, with no shortcuts other than scaling it down by half for me (with guaranteed leftovers), I can say the following:

Yes, it was a bit time consuming.
Yes, it was a bit rich and fattening.
Yes, it was worth it.
Yes, it was easier than I thought.
Yes, I will make it again. For sure.
Yes, it was Fan. Flipping. Tastic.

Rachel, I bow in your general direction, congratulate you on your guts, and blame you for the carb-fat I'm going to be gaining this coming winter.

On with the picture show, my friends.

BUTTERNUT SQUASH RISOTTO, ADAPTED FOR ONE PERSON

Butternut Squash Risotto, Step 1
Assembling everything in advance (a rarety for me, but I can't afford to screw this up -- I already got the wrong kind of pancetta, so I added a bit of crumbled bacon I had on hand to make up for it). Left to right, parmesan cheese, butter, bacon, rice, shallots, saffron, and pancetta (it's actually a close cousin, but we're calling it pancetta for simplicity's sake)

Butternut Squash Risotto, Step 2
Roast the diced cubes of fresh butternut squash in olive oil, salt, and pepper, until tender.

Note: I wish I had not added the salt and pepper at the various stages called for. Pancetta, butter, bacon, parmesan cheese -- these are all salty items and I should have waited until the recipe was done, and salted to taste. It was a bit heavy on the salt, but still delicious.

Butternut Squash Risotto, Step 3
Simmer my homemade chicken stock, which is probably the most profound change in my cooking to occur this year -- I made a pot of fresh stock from a rotisserie chicken, froze it in baggies, and finally understood why all chefs tell you to make your own stock. BECAUSE YOU NEED TO. YOU REALLY, REALLY NEED TO. I can say that barring a crisis requiring canned goods, I'll never go back to store-bought stock.

Butternut Squash Risotto, Step 4
Simmer the pancetta, shallots and bacon in the butter, until soft, but not browned.

Butternut Squash Risotto, Step 5
Add the rice and stir to coat the rice in the melted butter.

Butternut Squash Risotto, Step 6
Add a splash of white wine now, and simmer the rice in the buttery wine.

Butternut Squash Risotto, Step 7
Add the saffron threads and more salt and pepper. See note above -- I wouldn't add the salt and pepper next time. Trader Joe's, I curse you for having such a crappy spice selection, but, for those few spices you DO have, I thank you for making them so affordable.

Butternut Squash Risotto, Step 8
Adding the ladle of chicken broth. Ladle, ladle, ladle. Stir, stir, stir. Look at all those pretty ingredients. Rice, shallots, saffron ... coming together nicely.

Butternut Squash Risotto, Step 9
After lading broth and cooking in installments with continual stirring, it thickened up nicely, was velvety, and, ready to take the cubed, cooked squash, parmesan cheese, both added off the heat. Look how messy my pot is. My stove was worse.

Butternut Squash Risotto, Step 10
Hello, you beautiful, fattening, sexy beast. You don't come here often, do you?

Butternut Squash Risotto, Step 12

About this challenge: The Barefoot Bloggers join forces and cook or bake recipes by Barefoot Contessa Ina Garten each month, chosen in order by members, and present them for discussion on two Thursdays each month. Hungry? Please join us at the table!

Wednesday, April 30, 2008

Kitty Tuna


So named, because it's yellowtail tuna, and, I saw it on Kitty's blog this morning.

Kitty Tuna! Nyuck, Nyuck, Nyuck.

My favorite recipe from ANY food blog is one in which I realize "Say, I have all of those ingredients. I can make this right now."

My second favorite recipe is when I say "Hey, I have everything except (insert one missing ingredient)."

Most others are "Man, that looks good. I should bookmark that."

Kitty's recipe on My Husband Hates Veggies (once she returned from being AWOL that is), was a second-favorite category. I had everything but the tuna, it looked great, and best of all, it had a sure-fire testimonial: She made it THREE TIMES in the short period of time her husband was gone. That must have been good eating because I would have had a lot more confessional meals to share.

I won't repeat Kitty's recipe here, but I'll mention my minor adaptations:

1) When mixing the dressing ingredients in step 1, I wanted it to emulsify somewhat, so, I used my bullet blender cup, and, added about a two-inch long squirt of wasabi from a tube.

2) I forgot to add the chopped cilantro to the dressing, so I added it afterward, on top of the tuna, with the avocado.

3) I used Schezwan pepper salt to season the tuna steaks, for a bit of added zest.
4) I didn't have a lime, but I had 3 key limes and used those.

Delicious! Top Notch and a sure-fire repeat. As easy as she promised, too.


Sunday, April 13, 2008

I am a Braised Short Ribs Rock Star


Braised, fall apart roasts scare me more than yeast breads scare others. I've ruined more good cuts of meat by cooking it improperly than I care to count. Still, I was a "Cooking in the Kitchen with Kate" mood this weekend, for sure. It was the first weekend I didn't have a) the flu, b) a bad tooth following root canal and c) too much work to do at home. Add to the mix the fact I reorganized and set up a more professional looking kitchen this week (I had one of those moments laying in bed where you think of a great idea, and the next morning you are in line at Home Depot at 7:00 a.m. to get the materials), and all the pieces were in play -- I was going to cook up a storm.

Having already made french toast for breakfast, and a loaf of white sandwich bread in the afternoon, I watched an old episode of Paula Deen's show and she made a dish of braised short ribs. She made it seem so easy, and I've seen them on so many blogs recently, I really wanted to try a few short ribs. I immediately went out to the store, bought some ribs, and trolled the blogs looking for inspiration.

Ultimately I decided on an easy braised-in-a-dutch-oven version I found from an anonymous chef at the Food Network, and adapted it from there. When it came out of the oven tonight, I was a short rib rock star. The dish turned out VERY well (with one exception noted below) and I'll be sure to try this again in the future -- albeit in a colder month. Northern California was really warm and beautiful this weekend and you can't really pull off wintery dishes like this when butterflies and hummingbirds are flitting past you on the way out of the grocery store.

I only cook for 1 or 2 at most, so all my amounts are ballparked by me as I go along.

BRAISED SHORT RIBS

4 short ribs
1 handful of shredded carrot
1/2 of a chunked onion
3 garlic cloves
Sprig of rosemary
2 slices of pre-cooked bacon
1 tablespoon of olive oil
seasoned flour
1/2 cup red wine
2 cups beef broth

Step 1:

Chop up 1/2 an onion, 3 garlic cloves, some rosemary, some carrot, and set aside in a bowl. Season a few tablespoons of flour, and dredge the short ribs in the flour. In a heavy dutch oven, add 1 tablespoon of olive oil and a few pieces of snipped bacon, and heat until the bacon has rendered and the oil is hot. Add the short ribs, turning and browning each side.

Step 2: Remove the browned short ribs to a platter, and, add the reserved vegetables to the pan drippings, sauteing lightly until they are soft.


Step 3: Deglaze the pan with a healthy glug (I used about 1/2 cup) of red wine.


Step 4: After the pan has deglazed, pour into 2 cups of beef broth and bring the dish to a hard boil.


Step 5: After the vegetable broth has reached a boil, turn off the stove, and add the short ribs, assuring the liquid has come up at least half way up the sides of the ribs. Put the lid on the dutch oven, and put in a pre-heated 350 degree oven for 2 hours.

Step 6: After 1.5 hours, I checked and took off the lid. After 2.0 hours, it was fully browned, tender, and about to fall off the bone (but didn't).


Step 7: Prepare your favorite side dishes. For me, I made a simple mound of garlic mashed potatoes, and, hot brussels sprout slaw (pan fried shredded spouts, seasoned and served hot). Mound it up, baby.


So damn good. Every component was delicious. The ONLY change I'd make next time, is to trim up and off some of the fat from the ribs. None of the recipes I read said to do so, but honestly, there was so much fat in the pan, and thick pieces on the rib, that I really didn't want to fish my veggie mixture out of the pan because it was all under at least an inch of fat. I would hope that trimming that back wouldn't ruin the tenderness of the meat. There must be a happy medium, right?

P.S. The pan cost $39.99. The short ribs cost $3.99. That is SO me -- buying an expensive pan to cook the cheapest cut of meat imaginable. But I look at it as an investment. I still need to make that No Knead Bread. So NEEDED this pan.

Friday, February 15, 2008

Brussels Sprouts and Cod

I must be on a fish bent this week -- I've made fish and veggies yet again. I wanted to use up several rogue brussels sprouts left in my crisper, I had a piece of fillet of cod waiting for me, plus, one Meyer lemon going quite soft.

I wanted to eat without waiting for the sprouts to roast (my method of choice) and so I elected to pan fry them in the same method one would shred and pan-fry cabbage. Same great flavor as roasted sprouts, but much much quicker.

Pan Fried Brussels Sprouts with Bacon

HOT SPROUT SLAW

4 cleaned, thinly sliced brussels sprouts
1 slice bacon
1 knob of butter or lite spread
1 splash of olive oil
Schezwan Pepper Salt (or your spicy salt of choice)

Render one slice of bacon in a hot skillet. Add a knob of butter or spread, and a lite splash of olive oil, if you feel you need a bit more fat than the bacon provided (I did). Meanwhile, you will have cleaned the outer leaves from 4 sprouts and discarded the stems. Shred as for slaw, and add to hot skillet. I cooked half immediately, turning and toasting until it began to barely brown. I added the remainder of the slaw and cooked just until wilted and soft. In that way, I had a serving of hot sprout slaw in which some of it was warm, crusty and well browned and some was tender and butter. Best of both worlds. Season liberally with salt and pepper, or, as here, Schezwan Pepper Salt. I finished with a splash of lemon juice.


Pan Fried Cod

I seasoned and floured one fillet of cod, added it to the same pan as the sprouts, and quickly sauteed until well browned, adding copious amounts of lemon juice. Finished with salt and pepper, and serve atop the sprouts.

Verdict: Delicious!
Skill: Monkey Simple
Repeat? Definately on the Sprouts, but I'm done with fish for awhile

Tuesday, February 5, 2008

Pan Fried Trout with Roasted Vegetables

I was trolling the grocery store and saw one lone fish in the cold case, waiting to be taken home. A single rainbow trout. Into the cart he went. I looked for several recipes and ultimate decided on an adaptation of Wolfgang Puck’s recipe from the Food Network because I had all the accompanying ingredients on hand and it seemed very straight forward. I like straight-forward.

Let’s make trout and roasted vegetables for dinner, shall we?


Into the pan goes just a few each of baby cut carrots, red small potatoes, brussels sprouts, yam, and spring onion, with one thyme sprig and a bit of olive oil, for a quick saute. After they’ve turned just a bit golden, they’ll be taken from the fire and added to my toaster oven to continue to roast, while I prepare the fish.


I’m sorry, that I have to cut your head off, I really am. Next, we’ll trim the gills and fins, and remove the head. We’ll also cut three or four gashes into the sides, for seasoning.


Dredge the cleaned trout in seasoned flour. I used Dixie Fry. I’ve never understood why we take this step. My mother did, my grandmother did — and so I do as well. Why do we dredge the outside of a fish in flour, to create a crust, if we are not going to eat the crusty skin? It gets peeled off. Am I missing something here? Does it really flavor the flesh that much? Comments appreciated.


We’ll saute one side of the fish for 3-5 minutes, in a bit of olive oil and butter, until one side is brown and crusty. Flip it over, add another knob of butter and a few sage leaves, and saute the other side for 3-5 minutes, basting the fish with the sage butter (inside and on top).


As the fish is nearly down, take the roasted vegetables out of the oven, where they've become brown and toasty.


Plate the vegetables, trout, and sprinkle with freshly squeezed lemon.

Verdict: Delicious!
Skill: Easy
Repeat? Definately