Showing posts with label Fast. Show all posts

Sunday, September 20, 2009

My favorite salad ever: Austrian Lentil Salad

I first tasted a version of this salad in 1990, when my boss's wife, who is from Vienna, Austria, brought a large container of her version to my wedding reception, because she said it's a traditional salad to serve at weddings and promises fertility.

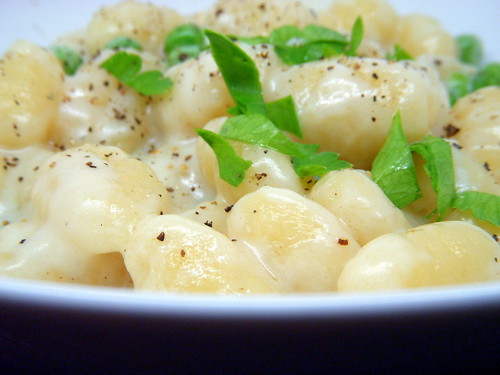
She was pouting when no one ate the salad. I thought "What did she expect, she brought Lentils to my wedding reception!"
Fast forward nearly 20 years, and I had a chance to eat her salad again, and my tastes have matured to the point where I thought it was incredibly tasty. I became an instant convert. I updated and significantly improved upon her recipe (she only used 4 ingredients -- lentils boiled with bay leaf, a simple herbal mustard vinaigrette, and minced onion), and now, I am never without a container of this salad in my fridge. I make it every Sunday, and it lasts all week, holds up extremely well in lunches, and fortunately, did not make me fertile, which is a very good thing, because her recipe lasted longer than the marriage.


I don't know what makes a lentil dish "Austrian" but she claims it was a childhood dish she had many times in Vienna. My version is not likely Austrian, but is certainly inspired by hers.  I use Trader Joe's ingredients primarily, which included steamed and cooked lentils, but you can easily cook your own lentils and proceed with those after you've done so.


AUSTRIAN LENTIL SALAD

Base Salad

1 package of Trader Joe's Steamed Lentils (from the refrigerated section)
1 package of Trader Joe's Beluga Lentils (from the pasta section)
1/2 very finely diced red or white onion -or- 1 shaved shallot (shown in this version)
1-2 very finely chopped carrots
Snipped Italian Parsley
The zest of one lemon (use all the juice, below)
Zest an entire lemon into a large bowl. Add both packages of lentils, the diced carrots and onions, and the parsley. Toss all ingredients thoroughly and set aside.


Dressing

The basic dressing is a lemon vinaigrette, but you should feel free to use your favorite oil & vinegar dressing, being certain to add the mucho lemon zest and lemon juice to it, to create the unique flavor. Here is my tried and true method:

1/2 cup of Trader Joe's Olive Oil
1/4 cup of Trader Joe's Seasoned Rice Vinegar (sometimes I use a bit of rice vinegar, and a bit of cider vinegar, when I want it tarter)
1 dollop of TJ's Dijon Mustard
The juice of 1 whole lemon
Salt and Pepper to taste

Combine all in a blender cup to emulsify, and pour over the lentil salad. Toss thoroughly, adjust seasonings to taste, and serve chilled. This salad requires no cooking (unless you've cooked your own lentils) keeps in the fridge all week, and makes a wonderful, healthy, high protein, high fiber very satisfying lunch.

In fact, I'd never once thought I'd say this about a salad, especially one with lentils, but I'll stand in front of my open fridge door at night and eat this salad right from the container, with a spoon. If I worked at a TJ's, I would make this easy dish and demonstrate it, to convert people to the wonder of lemony lentils as a salad.


Personal note to my sister, Weezie: Aren't you proud of me?! I finally figured out a use for my obsessive acquisition of vinegar and oil even though I've always hated oil & vinegar dressing!

Wednesday, May 13, 2009

Barefoot Bloggers: Tuna Salad

This month's first selection for Barefoot Bloggers is mine and I chose Ina Garten's Tuna Salad. This was a tough choice -- I moved up the list so quickly, I had to make new choices repeatedly as the time of year changed, and at the last minute, I just chose something I thought was fresh and simple and relatively healthy.

I also chose this recipe because the best "salad" I ever had was a grilled tuna salad dish at a Todd English restaurant -- Olives, in Las Vegas. It was so memorable I still think about it. Ina's recipe was similar in most respects, so I thought it would be a good stand-in.

Regrettably, I've learned that what I can get very easily -- tuna steaks for $5.69 a pound -- others cannot, so for those who gave this recipe a try, thank you, and for those who couldn't, I'm sorry about that. I trust you used the Barefoot Backtrack feature to choose something more to your liking.

I stared with Albacore tuna steaks -- $4.10 for the package. The steak is brushed with olive oil and grilled in a very hot pan. Ina instructs for just a minute or two on each side. This is essentially the same as the grilled tuna you'd find in restaurants, blackened on the outside and raw on the inside. While I do like this, I prefer my raw fish to be served to me in restaurants, and not handled in my own home, so for my version, I grilled it all the way through (and this is the way it was served in the Vegas restaurant, where I enjoyed it so much).

In the meantime, I'd mixed the dressing and tossed it with a chopped avocado, fresh from the Farmer's Market today. The dressing is very basic -- lime juice, olive oil, soy sauce, wasabi, salt and pepper. I ended up just whirling the ingredients together in quantities that tasted good to me. I didn't add nearly the salt she called for -- soy sauce takes care of that, and I added sesame chili oil in addition to the drops of hot sauce. I'm a hot sauce weenie, I don't like it all, but I know it serves an important purpose in certain dishes, like Asian dressings. I also added a lot more wasabi than called for. Love that stuff.

After the tuna chunks were grilled, I added them to the dressed avocados.
Now, bear something in mind. Ceviche, a traditional spanish dish of cold fish in a citrusy lime dressing, is "cooked" by adding lime juice to fish. The acid cooks the fish, so this tuna salad, which contains a lot of lime juice, cannot be made in advance and stored without the lime juice cooking the fish. If you're making it with a raw interior, don't dress the cooked tuna until you are ready to serve it, and reserve any leftover dressing. Store the tuna undressed, if you want leftovers. For mine, which was cooked all the way through, it was less of an issue, but head's up!

I added chopped scallions, more sliced avocado, and sprinkled with additional chili oil. I didn't bother with the red onions. I thought that a big handful of scallions was adequate for the onion flavor.

And here it is, my tower of Tuna Salad, ready to chill (it's great warm, but I preferred it chilled).


I really liked this. The dressing would be great with chicken, salmon, beef, tofu -- you name it. For those who gave it a try, thank you. Tuna isn't hard to make and it's easy to customize. In fact, I'd encourage you to cook a tuna steak and dress it as you would a traditional tuna salad. There is no comparison to the canned stuff.

About this challenge: The Barefoot Bloggers join forces and cook or bake recipes by Barefoot Contessa Ina Garten each month, chosen in order by members, and present them for discussion on two Thursdays each month. Hungry? Please join us at the table!

Sunday, February 15, 2009

Pot Roast French Dip Burritos


Sounds odd, doesn't it? I add additional pot roast slices to use, and some Au Jus, and a French Dip came to mind.

No buns, however. Ironically, I have not not purchased store-bought bread products since I joined the Bake Your Own Bread Movement (see my BYOB category for details) in January, and, I've made 12 loaves of bread, crackers, croutons and buns -- but I didn't have any bread for a French Dip sandwich. Fail.

What I did have, however, was a packet of raw tortilla dough. The only pantry items I have to use up from my pre-BYOB period is a package of raw tortillas, a frozen bag of mini sesame seed rolls, and several boxes of frozen mini Croissant dough from Trader Joe's. Nothing will convince me to make my own croissants from scratch, so, BYOB or not, those are sticking around.

Anyway, I digress. These paper thin dough sheets are just quickly toasted on a dry skillet to puff up and brown, and make for a fast and fresh tortilla. I toasted the tortilla dough in the pan until it was browned, and set it aside. I quickly sauteed leftover pot roast until it was toasty, and then added a scoop of mashed potatoes to the pan, and swirled those around until they were hot and pretty brown from the pot roast scrapings.

I spread the potato thinly on the tortilla, layered the pot roast on top of that, and then heated the au jus for dipping.

It's actually a lot tastier than it looks and it used up more leftovers. I'm on a mission! A mission, I tell you. I've reached a point where the more space I clear in my freezer, pantry and fridge, the happier I am. I think I just reached Grocery Saturation, and considering I often grocery shop for entertainment (nothing excites me more than the "new" counter at Trader Joe's -- how pitiful is that?), that's saying something.

Posted by Picasa

Wednesday, January 28, 2009

Best Breakfast Burritos EVER

I love this breakfast burrito so much, I've had it for dinner three times in the past week. It's so delicious, so simple, and so fast, it's my current love. I was inspired by the version made by Muneeba at An Edible Symphony, because as soon as I saw it, I knew it was the answer to what I disliked most about most breakfast burritos: The over-cooked scrambled egg and often greasy breakfast meats. I love the concept of a breakfast burrito, but I often dislike the end result for those two reasons.

As soon as I saw Muneeba's version, I smacked myself in the head and said "Of Course, use a softly fried egg, don't use a scrambled egg, silly, and that problem is solved! Who told you they have to include scrambled eggs?"

I had all the ingredients I needed on hand, and set to work.

Above: For my version, I started with a fresh tortilla, from dough. My local Costco sells the uncooked tortilla in paper thin sheets. The only require a quick heating (perhaps 1 minute or less per side) in a dry skillet to cook. Naturally, you can use a plain, cooked tortilla, but do heat it first, in a dry skillet, so that it warms the ingredients as you build. Here, I just place the uncooked tortilla in a pan, no butter or fats required, and turn it on high. Note it is slightly translucent.


Above: In about 30 seconds, the tortilla begins to puff, and turn white as the dough cooks.


Above: When the first side is browned and bubbly, turn it over with tongs and cook the other side very briefly, perhaps 15-20 seconds. The second side should be less brown -- we're going to be working on that side again in a little bit, below. Keep your pan warm, but not hot -- you'll need it again in a minute.

Above: Lay the tortilla on a paper plate or towel, and on the darker, more grilled side of the tortilla, quickly spread a thin layer of cilantro dip and sprinkle with shredded cheeses. Mine is my favorite -- Trader Joe's Roasted Pecan Cilantro Dip (basically a cream cheese and cilantro spread). Muneeba's version used Cilantro Chutney. I have that as well, but this dip is my preferred taste -- it's milder.

Above: Add another layer of your preferred toppings. Here, I used just a scattering of black beans, and a scattering of diced green onion. You could certainly add Spanish rice here, or avocado slices, or even shredded pork or carnitas. Here, I'm just keeping it simple to show you my base burrito. Set this stage of your burrito aside, and return to your warm pan.

Above: Lightly butter the skillet and softly fry an egg. You want the whites cooked gently, and still a somewhat loose yolk (but no runny whites, yuck).

Above: Just before it's ready to come out of the pan, I quickly break the yolk with just a swirl or two. I don't want it hard or cooked through -- I just want the yolk to be more evenly distributed with the egg white. Keep the pan warm, but not hot. Do not wipe it out.

Above: Quickly slide the egg from the pan onto your waiting tortilla. All photos from this point forward will be blurry because I dropped it right in my egg yolk! I tried to get the yolk off the lens. I think I need a q tip and alcohol.

Above: Fold up the sides and roll up like a burrito.

Above: Place the rolled burrito back in the warm pan, and using the trace amount of fat still left, begin to brown/crisp the outside of the burrito. Remember I told you that I spread the dip and toppings on the browner of the two sides? That's because when it goes into the pan again to warm up, the less brown side will catch up. This also helps melt the cheese a bit inside, and finishes cooking the soft egg.

Above: Slice in half, take a bite, and enjoy the best, most flavorful, unique, and definitely NOT greasy and heavy, Breakfast Burrito.

Tuesday, January 20, 2009

Ice Water Saltines

This recipe is so simple and delicious, it's going to ruin you for regular saltine crackers. I found this recipe in a cookbook by Marion Cunningham called "Lost Recipes" suggesting it's an old technique which has gone by the wayside. Pity!

This unusual treatment for saltines would be delightful if you are stuck with soup or salad for supper, but you forgot or don't have good bread and butter.

When I started, I followed the beginning of the recipe exactly, but that quickly proved very frustrating. First, the recipe called for WAY too much water (8 cups), and soaking the crackers in it for 3 minutes, and then soaking them in a full stick of melted butter. Nonsense. The water soaking alone made Cracker Goo and I didn't get any further then a pan of white paste.

My second attempt a few minutes later, with adaptations, was a very tasty success.

NOTE: This dish comes together very quickly and you must be ready. To begin, assemble 1) a pan of of ice water; 2) a dish of saltine crackers; 3) melted butter; 4) salt and herbs; and 5) paper towels.


1) The original recipe was to fill a small pan with ice water...


2) ... and then place 24 crackers in the ice water, and soak them for 3 minutes. Do NOT do this. You will waste 24 crackers, and the ice water.

3) Instead, I removed the ice so that I had icy cold water, and simply dunked and held each cracker in the cold water for a slow count of ten --- one one thousand, two one thousand, three one thousand -- to ten for me worked great -- and then removed and soaked on a piece of paper towel.


4) You can use a strainer to remove the cracker, but honestly, once I began to dunk with my fingers, I found I had more control by just holding them under water and removing them. They are too delicate when wet to handle much with tools, and holding them under water let me "feel" when they were ready to take out -- strong enough to still hold, but wet enough to be very moist. Monitor this carefully. Also, choose only crackers which are whole and do not have cracks. That will lead to disaster. Once soaked, let the crackers drain slightly on a paper towel or piece of parchment paper.

5) Meanwhile, heat your oven to 400 degrees. I poured the ice water out of my pan, dried it, and melted a few tablespoons of butter in it (the next time I make this, I'm just going to have a small bowl of icy cold water for dunking, and have the pan already heated with butter in it, waiting for the post-dunk). The recipe called for a full stick of butter for 24 crackers. I thought this was madness and just used a few teaspoons (maybe 3, tops) for 9-10 crackers.

6) Carefully pick up the moist crackers from your towel, and ease them into the buttery pan. You can add more butter to the top as the recipe directed, but I found the butter bubbled up through the holes just fine, and no additions were necessary. Bake at 400 degrees for 15-20 minutes, monitoring carefully to assure they don't burn, but do let them get well browned so the crispness returns.

7) These were my crackers after 15 minutes. Perfect. Some of the salt came off in the ice water, and I used unsalted butter, so I sprinkled a bit more. If you used unsalted butter, you may wish to season as I did, but if you used salted butter, it probably won't be necessary. I quickly sprinkled thyme leaves on mine, and as soon I did, the heady aroma of thyme released on the hot cracker. It was a taste sensation, so next time, I'd add the thyme to the butter in the pan, to infuse the cracker.

The crackers were very crisp and delicate, like buttery, salty pastry. They were not fall-apart flaky -- you can easily top them and use them as a crostini or bruschetta, or just serve along side a bowl of tomato soup (basil leaves on the crackers would be fabulous for this).

As for me, I just topped them with some cold shrimp salad and blissfully munched on this tasty, vintage, treat for my own little Tea Party For One.
Your diners will not know these are store-purchased crackers. The transformation is unique, delicious, fast, and easy. Be prepared for your ladies-who-lunch-friends to say "Ooooooooooooooooh, I'm going to try this myself!"

Sunday, January 11, 2009

Breakfast for Dinner: Baked Eggs


No recipe for this, just a method basically. Line a cupcake tin with your choice of thin meat -- lunch meat ham, or perhaps proscuitto. I used shaved ham, and it was rather delicate, with many gaps, so I used quite a few shaved slices to plug gaps, and I lightly buttered the cupcake tin in order to make sure the egg released, if it leaked through the ham. One the ham was layered, I grated a bit of Gruyere over the ham, and sprinkled about 1/2 teaspoon of cream. I cracked one egg into each cup, and added another 1/2 teaspoon of cream, and a bit more Gruyere. I topped each egg with crumbled bacon bits and seasonings, and baked at 350 for about 15 minutes.

I guess that *is* a recipe, isn't it?
Posted by Picasa

Sunday, August 10, 2008

Naan Pizza


In my continuing "clean out the freezer" mode I was able to whip together a tasty little morsel of pizza today for lunch, using a piece of frozen Trader Joe's Naan bread as the crust base.*

I'd also made a blender cup full of Pizza Sauce, another "use it up" task, over a month ago. I have too many cans of tomato paste. I'm not a big pasta fan and even when I make pasta, it's seldom a tomato based sauce. Still, when I see cans of paste on sale, I think I have to have it and I end up with too much of it in the pantry. I found a pizza sauce recipe that sounded tasty, adapted it for my taste, and my, it was EXCELLENT. Tomato pasta sauce, I don't like. Pizza sauce, I do. ::shrug::

Anyway, saw the sauce, saw the naan, saw the mushrooms -- pizza for lunch!

I coated the slice of defrosted naan with a thin schmear of butter, a thin schmear of pizza sauce, a few tablespoons of grated cheese, 4-5 shaved mushrooms, and baked. Voila, a mighty tasty pizza.

Kate's Pizza Sauce

1 (6 ounce) can tomato paste
6 ounces hot water
3 tablespoons grated Parmesan cheese
1 teaspoon minced garlic
2 tablespoons honey
1-2 teaspoons anchovy paste
1 teaspoon onion powder
1/4 teaspoon dried oregano or one handful of fresh oregano
1/4 teaspoon dried basil or 2 teaspoons of pesto or one handful of fresh basil
1/4 teaspoon ground black pepper
1/8 teaspoon cayenne pepper
sea salt to taste

In a small bowl, combine tomato paste, water, Parmesan cheese, garlic, honey and mix thoroughly. Begin to add anchovy paste and all spices, and mix, tasting as you go. Allow to sit for at least 30 minutes to blend and adjust seasonings a second time. I added more anchovy paste and honey, for instance. This is a flavor that adds a complexity and saltiness I love. I think many people only think they don't like anchovies -- it's a salty briny flavor that is wonderful and complex, and not fishy when used in this manner.

My jar of pizza sauce has kept very well, for weeks at a time. Easy to spread on toast for a quick Po' Folks Pizza for kids (which is a slice of toast, sauce, and a slice of cheese melted in a toaster oven).

*Do not even consider buying the bakery aisle packages of Naan from Trader Joe's. They are an abomination. Thick, tough, stale, flavorless --- blech. The frozen variety, however (which still pales in comparison to fresh Naan from a restaurant) is a passable pre-made Naan.

Used up: Pizza Sauce (tomato paste), Mushrooms, Frozen Naan

Saturday, August 9, 2008

No Flap, Jack ...


... these are pancakes.

I loved the pancake square technique suggested by Robin Sue at Big Red Kitchen so much, I wanted to leave my office and go home to make them. Immediately. I restrained myself until the weekend, but knew I'd be making these come Saturday morning, and make them I did.

I may never flap my jacks again.

This is SUCH an easy method, I wonder why it's never occured to me before, or why I've never seen it before? You simply butter a baking pan, add your pancake batter, and bake until set. Cut in squares, and serve.

As Robin Sue points out, it's easy to customize these pancakes by any number of additions (fruit, nuts, chocolate chips, etc), but I'm a purist. I like butter and maple syrup, and that's about it -- another reason recipe Robin's appealed to me. It was plain and simple.

I followed her recipe almost exactly, but for using vanilla bean sugar instead of plain, and, I wanted a thinner pancake with more crust to cake ratio, so instead of using an 8x8 pan, I used an 8x12 pan for a thinner, more crusty area bar. They cooked in 20 minutes and popped out easily.

In prepping my pancake squares to eat (I buttered the top of the entire pan), I recalled I had a jar of maple butter waiting to be used, and that was a mighty fine substitution for more butter and syrup. The maple butter is really just a big jar of maple icing, truth be told, and I ended up with Maple Bars which were scrumptious.

A huge plus: Because this is really a method more than a recipe -- really you could use your favorite pancake mix and a toaster oven and have hot breakfast before your hair is dry. Just shake up some pancake batter of your choice and pour it into your buttered pan, and if you place it into a toaster oven which shuts off with the timer, you'll bake them without burning (and get some crusty tops), and they'll be ready by the time your morning shower and toilette is finished. No standing over the stove with a spatula, rebuttering the pan, making people wait their turn for a hot pancake or lamenting over the rejects. These will also freeze like a breeze and I can pop one into a bento box for breakfast at work during the week.

Thanks, Robin!

Robin's Pancake Squares

3/4 cup milk
2 T. melted butter
1 large egg
1 T. sugar
1 cup flour
2 t. baking powder
1/4 t. salt

Preheat oven to 350°. Lightly grease an 8x8 baking dish (for thicker bars) or 8x12 baking dish (for thinner squares). In a large mixing bowl, beat together milk, butter and egg. Add sugar, then gradually beat the flour in. Carefully stir in the baking powder and salt. Pour batter into prepared pan. Bake for 20-25 minutes. Serves 4-6.

Saturday, June 14, 2008

I love Penzeys. They are good to me.


I'm really impressed with Penzey's. I "discovered" this spice store (online) a year ago while reading other blog love stories, and I love most of their blends, and especially the Sandwich Sprinkle, which I keep on my stove and use just like Paula Deen uses "house seasoning."

I recently ordered my favorites, didn't spend much at all (less than $10), but even so, in my box was a recipe for Southwest Salad and an entire complimentary jar of their Southwest Seasoning. It tasted like a very fresh taco seasoning. Free is fun, but a full jar for a small order? And good stuff? That makes me love them even more.

I pounded flat a small piece of beef into a sandwich steak, and sauteed it with the Southwest Seasoning for Carne Asada, and then just mixed fat free Greek yogurt, fresh pico de gallo, and Penzey's southwest seasoning in the dressing, for a "Salsa Ranch" dressing that was really good.

15 minutes from fridge to table and it was really delicious. If I ever come back east, I'm heading to one of these stores.

Monday, June 9, 2008

Coriander Chicken

This is a simple supper adapted for one or two persons, from Best Ever 30 Minute Cookbook by Jenni Fleetwood. Simple, tasty and fast. Coriander / Cilantro Haters -- look away now before you are traumatized.

Step One:

Pound out a chicken breast to desired thinness, and add to a hot pan with a bit of olive oil and butter. I like mine particularly thin because a) it cooks more quickly and b) it gets nice and chewy. I'm not a fan of wet or moist chicken. As the chicken breast is cooking ...

Step Two:

... I heat a pannini press that I found at a garage sale for a buck. I use it to weight down just about anything I want flat in a pan, from sandwiches to bacon. This is optional of course, but by heating it on that back burner you see peaking out back there, and placing it on the chicken, it browns evenly and ...

Step Three:

... develops these nice grill marks which are more attractive in pan fried meats. Get your chicken nice and sizzling, and then ...


Step Four:

... begin to break it up with a sharp knife and fork. Yes, you could dice it up in advance, but I like to shred my chicken AS it cooks in the pan, and not before, because it gives more interesting shapes, different sizes and textures, chewy brown edges and bits and pieces, and prevents it from looking like those uniform chunks you see in a can or frozen meal.


Step Five:

Now, add a knob of creme fraiche. I used a little over 2 tablespoons, and added it right to the pan. I should have scooped out a bit more of the olive oil than I did -- I had a bit too much for my liking. Act accordingly. Begin to stir right away to melt it and ...

Step Six:

... quickly add a big handful of chopped cilantro, stirring quickly to wilt.


Step Seven:

If you take the pan off very quickly, you'll have a somewhat creamy sauce. If you leave it a moment or two and really melt and wilt the creme and cilantro, you'll see it disappears into a rich, buttery tasting fat, like this, below. Grind fresh salt and pepper over all, and serve hot.

Sunday, May 25, 2008

Dutch Baby for One


I'm hopeless at making pancakes. Always have been, always will be. I don't get the batter right. I turn them too soon, or not soon enough. I'm told to watch for "dry looking edges" and then flip, and when I do, the underside is either not browned, or has mottled black spots. I'm told to look for air bubbles having popped through, and then flip. Same result. My pan is too hot, or not hot enough. Oh fiddle. I just don't make them anymore. Waffles, occasionally, will make into my rotation because they are cooked in a waffle maker and I open the lid when it dings. But not pancakes.

Today, however, I decided I'd try a German Pancake -- a Dutch Baby. I remember my mother making them when I was teen -- but only when we had company over for breakfast. I'm surprised this was considered only "company fare" because there is no greasing of the griddle, no lifting the edges of the pancake to see if it was anything close to diner-style brown, no standing and cooking in batches. With four kids, I'm surprised we didn't see a big puffy pancake more often.

With this recipe for one, I knew I could try it in my toaster oven and do nothing but stare. There would be no scooping and pouring of spoonfuls of batter onto a griddle, tearing off and eating the brown edges of the previous failed pancake*, scowling. With the Dutch Baby, you pour it all in at once and leave it be until it's time to say "Taa dahhh!"

So how was it? Perfection, I tell you! I actually giggled out loud whilst staring into my little toaster oven. This was so easy, I may actually try making popovers.

Dutch Baby for One

PANCAKE
1/4 cup flour
1/4 cup fat free milk
1 egg
Dash of nutmeg
1 pat of butter

TOPPINGS
1-2 tablespoons of jam or syrup
Powdered Confectioners Sugar
Lemon

Heat your oven to 450 degrees and ready an oven proof skillet by heating it in the oven. In a mixing bowl, combine the flour, milk, egg, and nutmeg, beating to combine. Let the prepared batter sit a moment while you take the hot pan out of the oven, and quickly add butter to melt and swirl in the bottom and up the sides of the pan. I used a 6 inch personal cast iron skillet ($1.00 from Goodwill -- Score!), and one pat of butter was plenty. Try not to brown it. When coated, pour the contents of the batter into the pan, swirl it lightly to coat the bottom of the pan, and put in your hot oven for approximately 15 minutes, until well puffed with very brown edges.

Remove and serve immediately -- have your toppings ready because while this puffs up dramatically, it also deflates quickly. Quickly sprinkle with confectioners sugar, lemon juice, and top as desired with fruit or jam. I used a bit of sugar, a lot of lemon juice, and a dollop of Sour Power Cherry Rhubarb jam.

"As God is my witness, I'll never burn pancakes again!"

*Actually, I see a lot of pancakes on Tastespotting that look exactly like my "failures." Browned edge rings, but not an even amount of brown across the surface, etc. These are rejects, to me. When I was 8 years old, my family was driving late at night through Provo, Utah, with a car full of hungry kids and the only restaurant open was Bob's Big Boy. I had a plate of pancakes. They were unusually and deeply yellow, an even, perfect brown from edge to edge, and as big as dinner plates. They were so good, and I was so hungry, that this pancake became the standard by which I judge all pancakes.

Calories 306.0 Fat 9.5 g Carbohydrate 42.4 g Fiber 1.1 g Sugars 11.0 g Protein 11.7g

Saturday, May 24, 2008

Gnocchi Gorgonzola with Peas Parsley and Pepper

Gnocchi Gorgonzola with Peas Pepper and Parsley

Northern California is having an identity crisis. A few weeks ago, we set a record for a week of 100+ degree days in early May. It was so bad it burned a lot of my garden.


Last week, it was so windy I couldn't ride my bike to work or I'd blow over.

This week, it's cold and raining. Today was so cold and blustery, I needed a hot pasta dish.

Trader Joe's Gnocchi Gorgonzola

Parsley from my garden

Peas from my freezer

Pepper from my pantry

The frozen pasta and sauce dishes from Trader Joe's, are, for the most part, very much to my liking. I particularly like the fact the sauce is is formed into individual frozen nuggets, separate from the pasta. Seldom do I need as much sauce as is provided in the bag. The finished product doesn't need to be saturated for me to enjoy it. Enter the plastic sandwich baggie. I fish about 50% of the sauce nuggets out of most of their products (there is a veggie entree with balsamic butter nuggets, another with marinara cheese nuggets, etc) and place them in a plastic baggie in the freezer. One night when you want to saute a chicken breast, just throw two nuggets of Gorgonzola Sauce in the pan afterward (makes a tasty addition to a pot of soup as well). It's "just enough" some nights.

Friday, May 23, 2008

Chicken Escalopes with Lemon and Prosciutto


This is a perfect Friday night entree for both a single person and a family. It's just as easy to make a serving for one, as it is for many.

CHICKEN ESCALOPES WITH LEMON AND PROSCIUTTO

Assemble chicken breasts, prosciutto or Serrano ham, lemons, butter, salt and pepper.


Pound chicken breast to a pleasing thickness. I prefer thin.


Ribbon a slice of Serrano ham or prosciutto across the breast, being certain to leave some ruffled edges so that your other toppings may get to the chicken as well. See that little pan? I love it. It's a $1.00 mini pan from Daiso, a Japanese "dollar store" and I use it constantly. I've placed the butter pat there to show you the size.


Mix soft butter (I used one and a half pats for a single serving -- and first rubbed a bit on my little oven pan) with salt and pepper. I used sea salt, ground pepper, and then added a bit of smokehouse pepper as well. Chopped herbs, particularly thyme, would be good, but I was sticking to the simple recipe for this post. Dot the butter mixture over the meats. Top the buttered meat with thin slices of lemon.


Bake at 350 degrees for approximately 30 minutes to get a crispy brown done-ness, or less if it is to your liking. At the last few minutes, I switched to broil to get the top crispier. Reduce and spoon any pan juices over the chicken and serve with a vegetable which was roasting along side.


Adapted from 400 Three and Four Ingredient Recipes by Jenny White and Joanna Farrow.


Have a lovely holiday Memorial Day weekend, everyone. May your memories of loved ones gone before, bring you comfort.

Thursday, May 15, 2008

If a Fish Taco is good, a Rainbow Trout Burrito should be great!

I had a leftover rainbow trout fillet broiled with lemon and seasonings, and enough produce to whip up a Rainbow Trout Burrito. I can't imagine it wouldn't be terrific, but the noon hour will tell the tale, when I eat this for lunch today.

Update: I tasted a bit. It's good. Darn good. You can customize this is a dozen ways. Mix your own cilantro and sour cream or greek yogurt, add shredded cabbage instead of letuce. Add peppers. The lemony fish and the pungent cilantro dip was a winning flavor combo.

KATE'S RAINBOW TROUT BURRITO

1 grilled rainbow trout fillet or other firm fish of your choice
1 tablespoon of Trader Joe's Cilantro Roasted Pecan dip
1 olive oil wrap or tortilla
Lettuce leaves
Chopped Tomato
Lime
Seasonings

Lightly grill or toast the olive oil or tortilla to give it some color. I sprinkled it with Penzey's spices while doing so. Schmear with a tablespoon of cilantro dip, layer with produce, the cooked fish, roll up, and seal the wrap with food pics. Keep chilled until ready to eat. I packed a sliced key lime to squirt over the fish when I take a bite.

1 Trout Burrito

2 Trout Burrito

3 Trout Burrito

4 Trout Burrito

5 Trout Burrito